Browse Our Knowledge Base
SIU Email Signature Instructions
Overview
When using your SIU email for internal or external communication, it is important to include an email signature so that others know how to contact you and to indicate your association with the university. To maintain consistency across all areas, SIU has provided specific guidelines on how email signatures should be formatted.
The Office of Information Technology (OIT) has created an Email Signature Generator to make this process seamless; simply choose the branch of the SIU system that you are associated with, enter your information, and let the generator format your signature for you!
The steps below will walk you through adding an email signature in both the Browser and Desktop versions of Outlook.
Outlook Browser Version
1. In your preferred browser, go to office.siu.edu.
2. If prompted, sign in with your SIU email address and password.
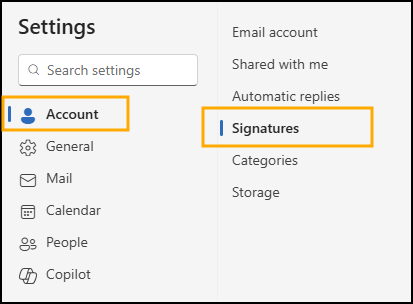
3. In the top-right corner of the window, click the Settings cog wheel.

4. Click Account, then click Signatures.
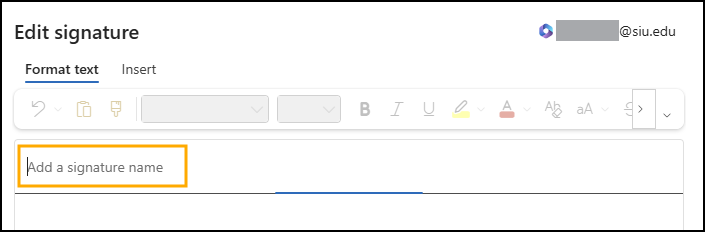
5. Click the Add Signature button.

6. Add a Signature Name. It’s recommended to name the signature (ex: “SIU Official”) to easily distinguish between other signatures you may have or create later.
7. Paste your SIU signature from the Email Signature Generator into the blank box below Signature Name.
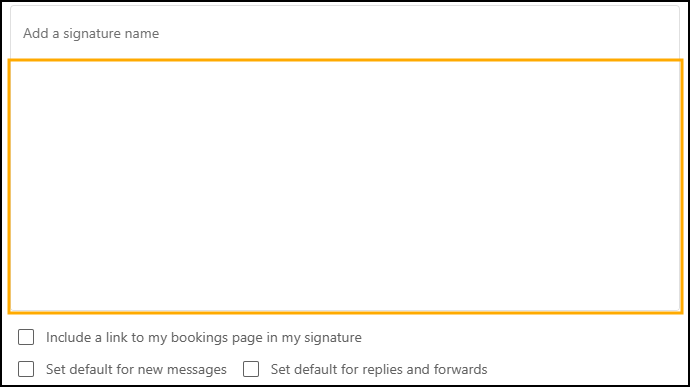
8. Select one (or both) of the Default Signature options you would prefer:
- For New Messages: automatically includes your email signature on all new emails that you send from your SIU Microsoft account.
- For Replies/Forwards: automatically includes your email signature on all replies or emails that you forward from your SIU Microsoft account.

9. Click the Save button. Your email signature has been successfully created and saved!

Outlook Desktop Version
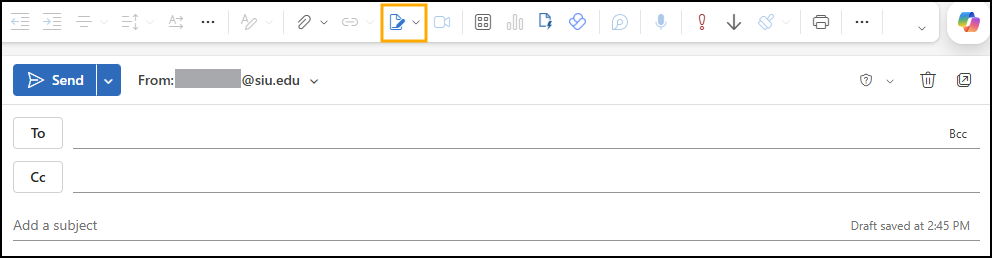
1. In the Outlook Desktop app, click the New Mail button in the top-left corner.

2. Click the Email Signature button from the menu bar at the top of your email.
3. Click the Add Signature button.
4. Add a Signature Name. It’s recommended to name the signature (ex: “SIU Official”) to easily distinguish between other signatures you may have or create later.
5. Paste your SIU signature in the blank box below Signature Name.
6. Select one (or both) of the Default Signature options you would prefer:
- For New Messages: automatically includes your email signature on all new emails that you send from your SIU Microsoft account.
- For Replies/Forwards: automatically includes your email signature on all replies or emails that you forward from your SIU Microsoft account.
7. Click the Save button. Your email signature has been successfully created and saved!