How Can We Help?
Yubikey Hardware Device Instructions – MacOSX
Overview
This guide walks you through the setup, configuration and other methods of manipulating the Yubikey hardware token used in Multi-Factor Authentication on MacOSX computers.
Technical note: These instructions work for the Yubikeys supplied by the university for those who traded in their Duo token. If you purchase your own key, these instructions work with the newer Yubikey FIDO 2 keys, including the Security Key (C) (NFC), YubiKey 5(C) (NFC), and YubiKey 5(C) (NFC) FIPS. They may generally work for most FIDO 2 devices.
Please contact SalukiTech if you have any questions on purchasing your own Yubikey if you do not have a Duo token to exchange.
Downloading the Yubico Manager for MacOSX computers
If you are setting up a new Yubikey/FIDO2 Device for the first time on an Apple computer (iMac, Mac Book Air, Mac Book Pro) you must configure it with a security key PIN first. To do this you need to download the Yubikey Manager from Yubico.
- Open a browser (Safari) and go to Yubico website: https://www.yubico.com/
- On the ‘Support’ tab, Click on the ‘Downloads’ Link.
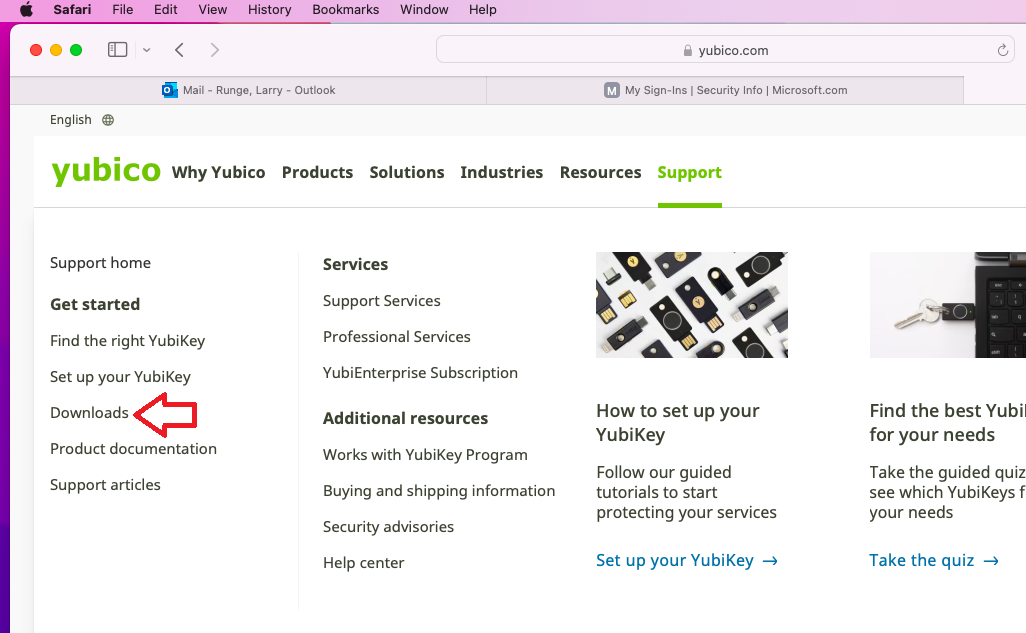
- On the ‘End-user Tools’ page, click ‘Downloads’.

- Scroll down on this page and click on the link ‘macOS Download’.
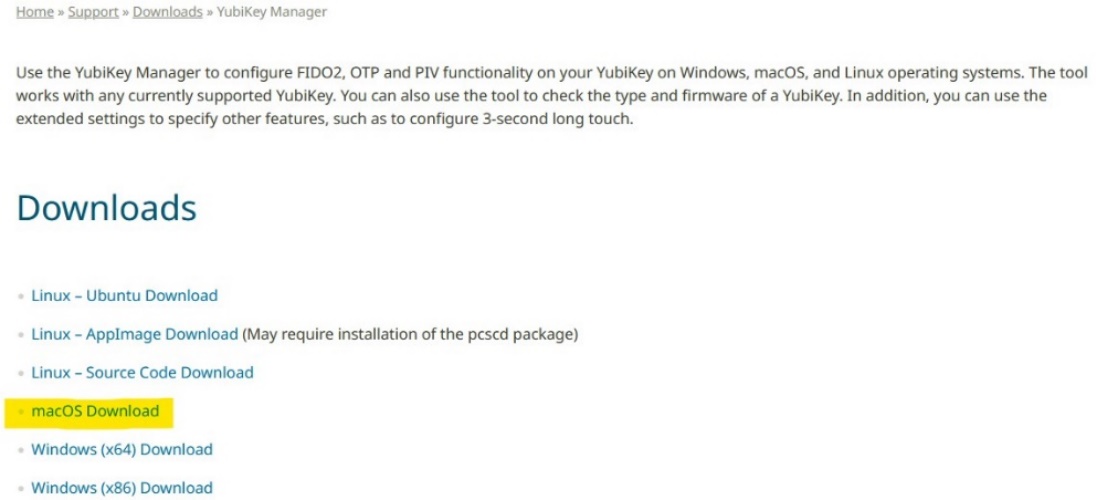
- Your browser will ask ‘Do you want to allow download on www.yubico.com‘, click ‘Allow’.

- After the Yubikey Manager download is complete it will be in your ‘Downloads’ folder, in the latest version of MacOSX it will pop-up on the lower left-hand side of the Dock. Double click the .pkg file to install the software.
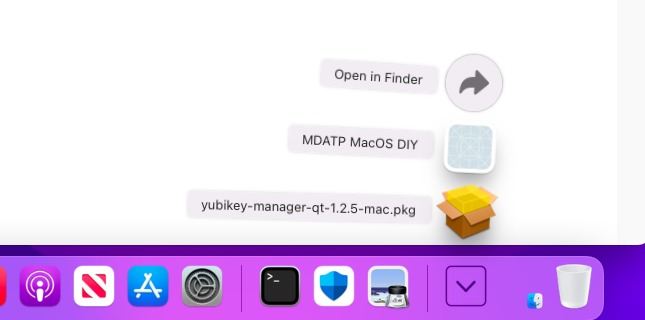
- The Yubikey Manager installer will launch, click ‘Continue’.
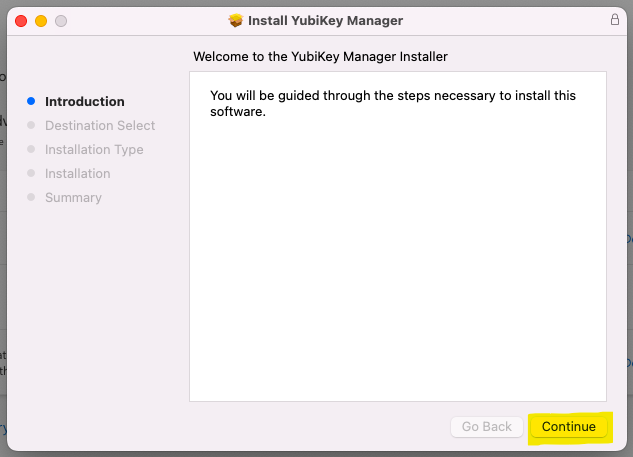
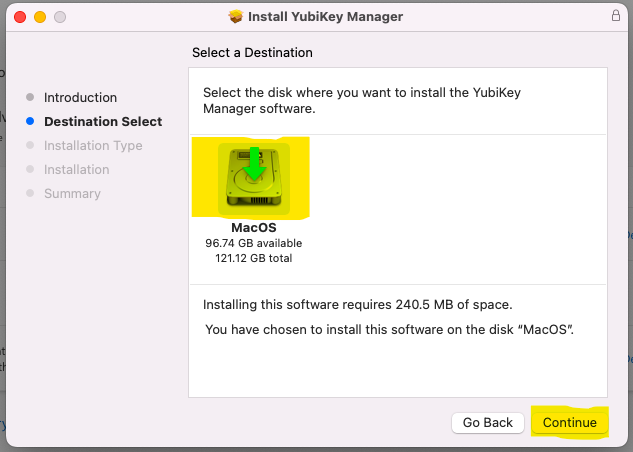
- It will ask you to ‘Select a Destination’, select the main OS drive.
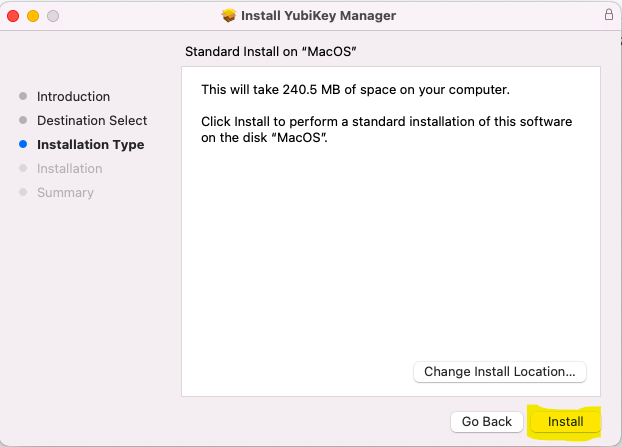
- You will get a summary of what is being installed, click ‘Install’.
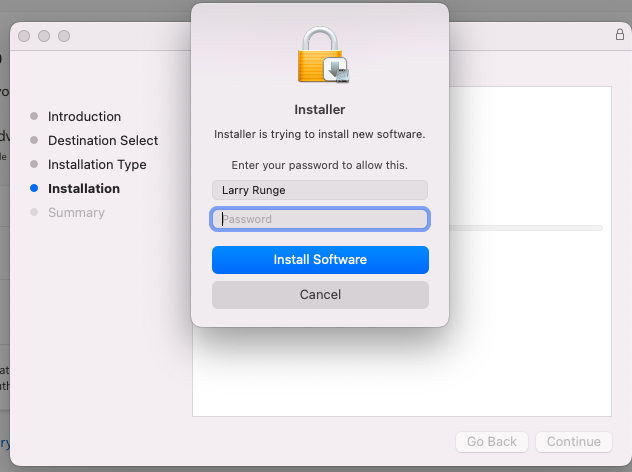
- You will be prompted to input a password; this is the password you use for your computer, then click on ‘Install Software’.
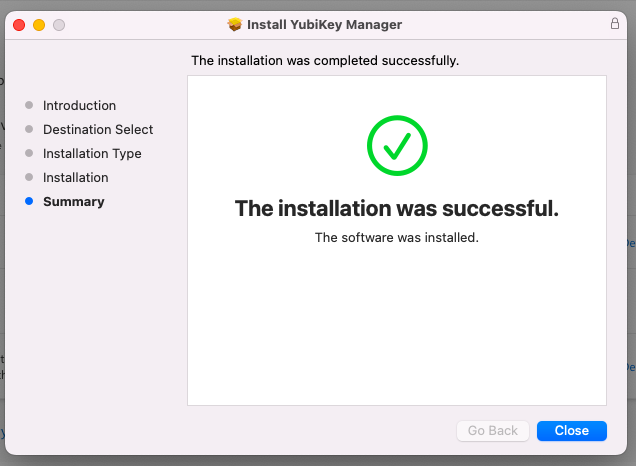
- Once the installation is complete, click on ‘Close’.
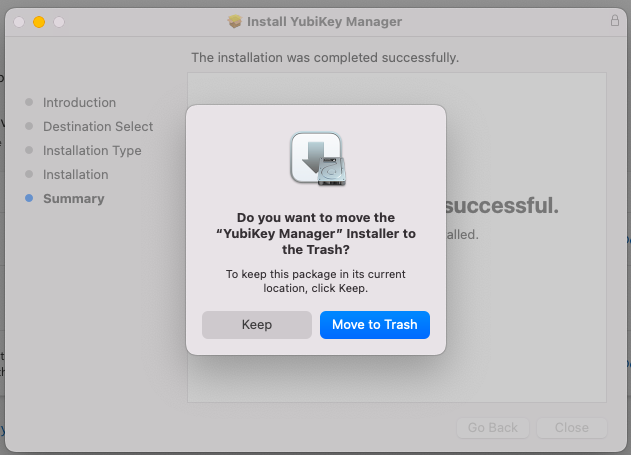
- You will be asked if you want to keep the package that you downloaded, this option is up to you.
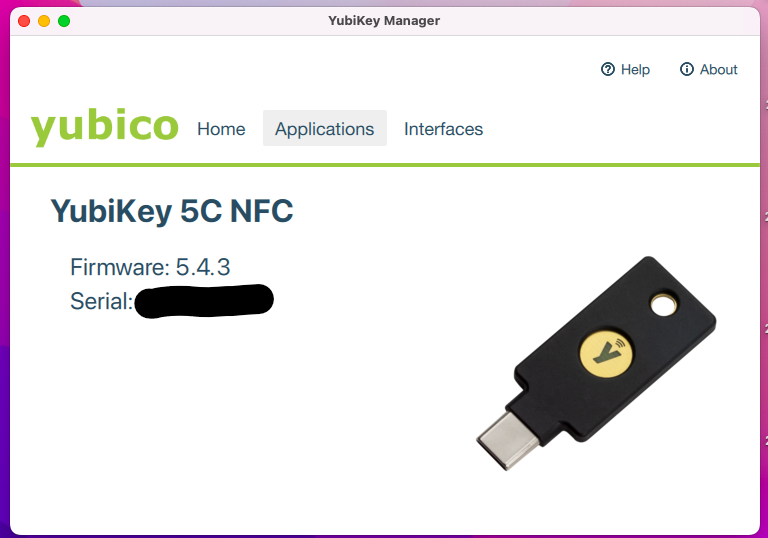
- Now we need to launch the software, click on the Launchpad on the Dock and look for Yubikey Manager icon; click on that to launch the software.
Creating a PIN for Yubikey / FIDO2 Devices
Note: You MUST run this software as an administrator!


- Once the Yubikey Manager software is open, insert the USB key in your computer, you will see some information about your key.
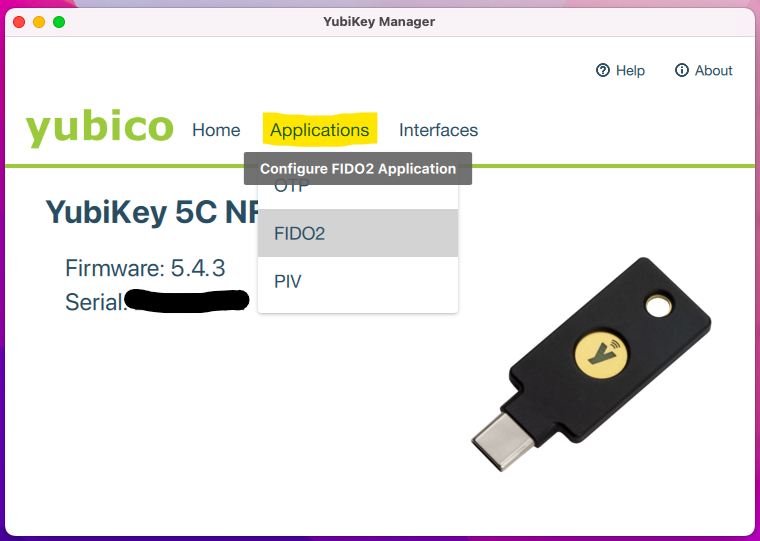
- On the ‘Applications’ tab select the ‘FIDO2’ option.
- Click on ‘Set PIN’.
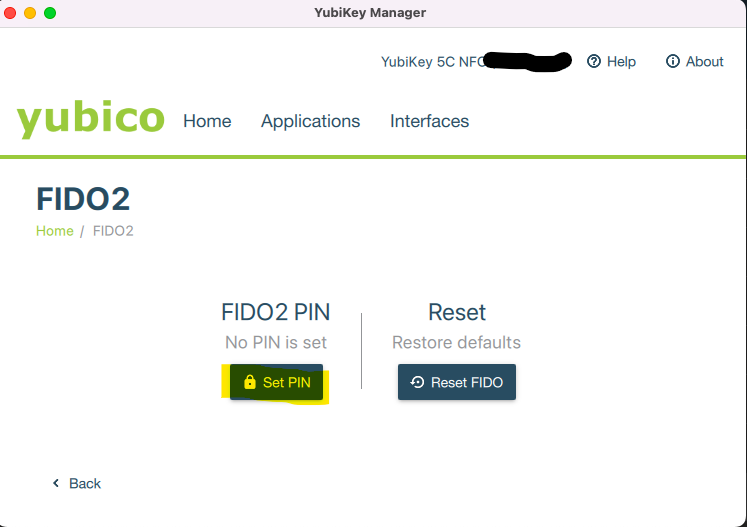
- Enter a secure PIN here. This is alphanumeric, meaning you can use letters or numbers and must be between 4 and 63 characters in length.
SIU recommends a 6-character password for your Yubikey. This doesn’t have to be overly complex and should be something you can/will remember. Entering this wrong 8 or more times will reset the device.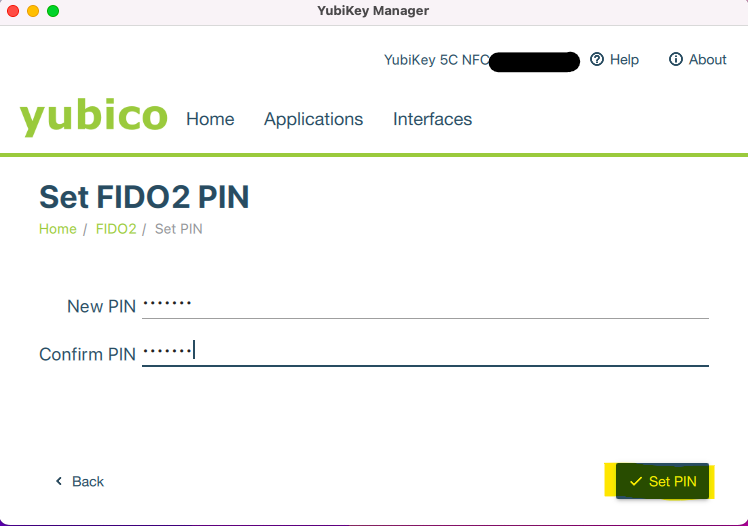
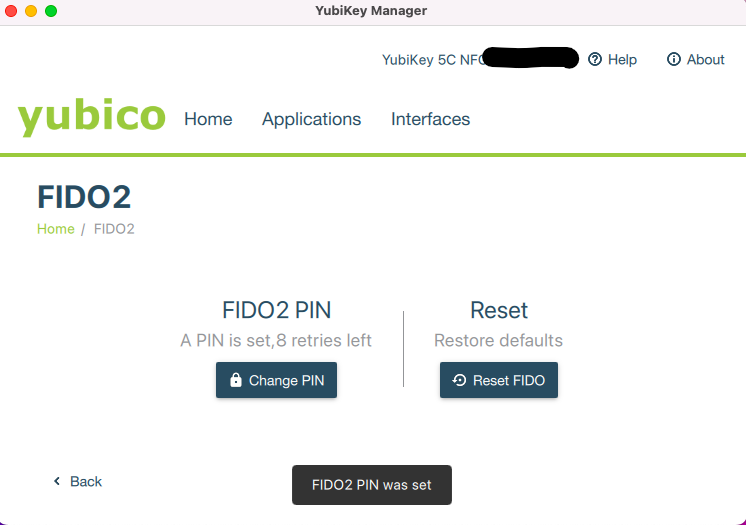
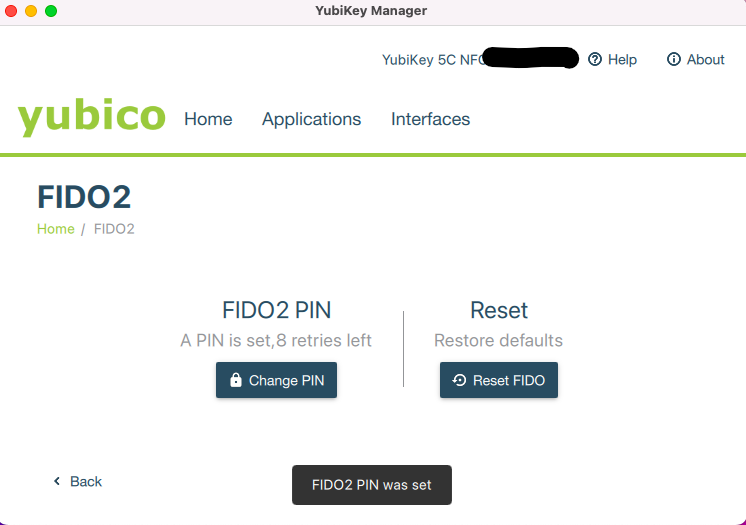
- A small pop-up at the bottom of the screen will confirm that your FIDO2 PIN is set.
Adding a Hardware Token to Your SIU / Microsoft Account
- Login to office.siu.edu click your profile and go to ‘My Account’ then ‘Security Info’. Use the direct link here: https://mysignins.microsoft.com/security-info
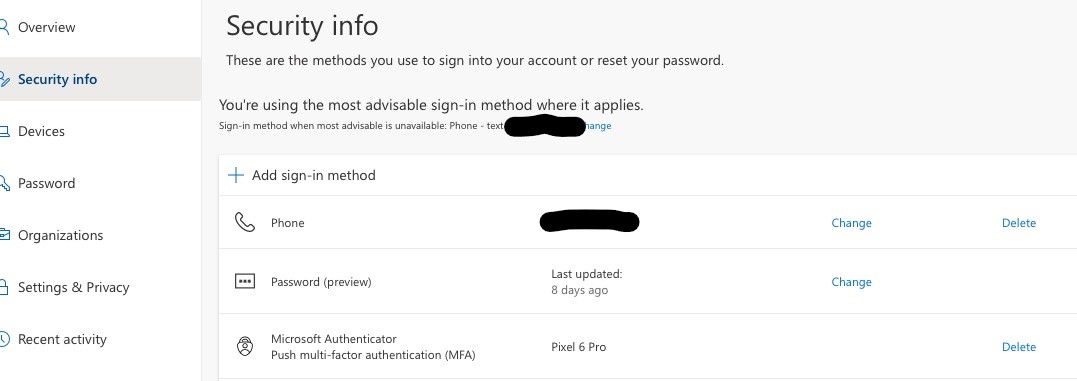
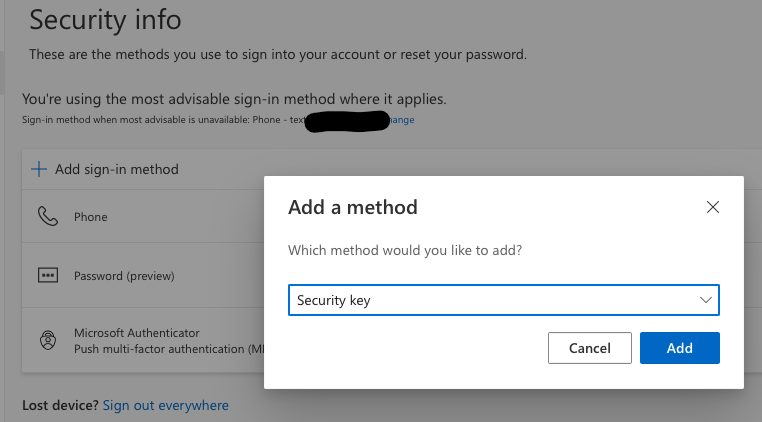
- Click ‘Add sign-in method’ select ‘Security Key’ and click ‘Add’.
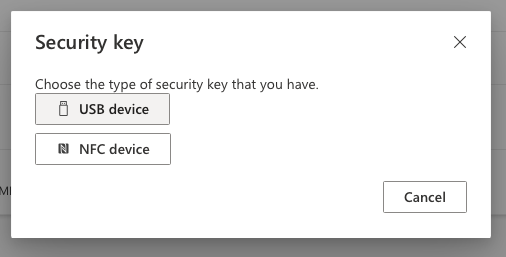
- Select USB (or NFC if you are operating your NFC-capable hardware token via a mobile device).
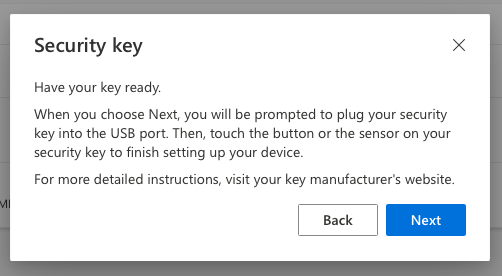
- You will now be advised to have your Yubikey ready and click ‘Next’.
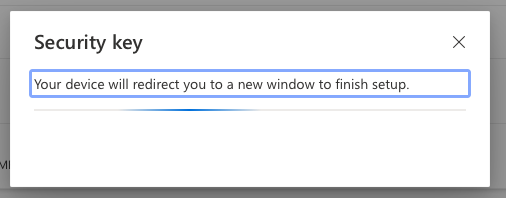
- This will pop-up for 10 seconds while the site looks for attached security keys.
- Select ‘Security Key’ from the next menu and click ‘Next’.
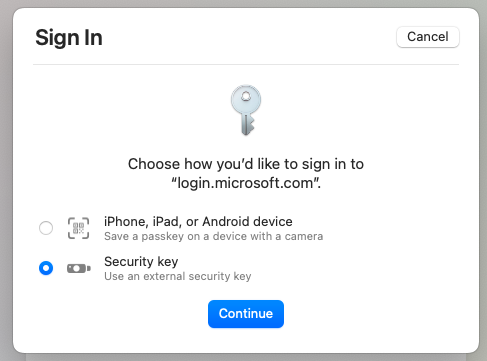
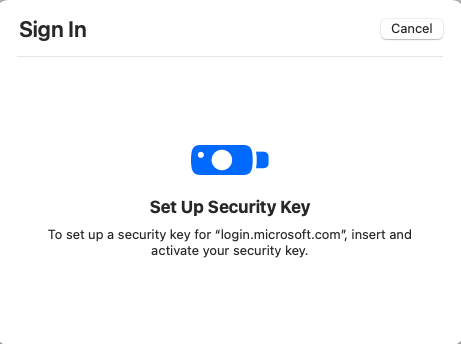
- You will be prompted to insert your security key and touch it to start the pairing process.
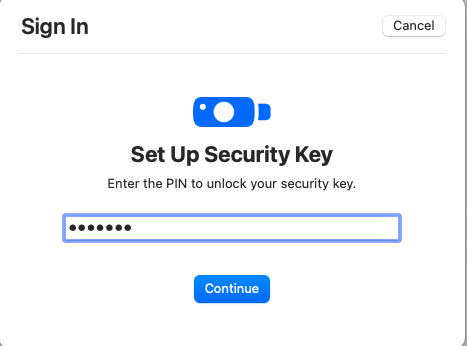
- Now you must enter your PIN for the security key then click ‘Continue’.
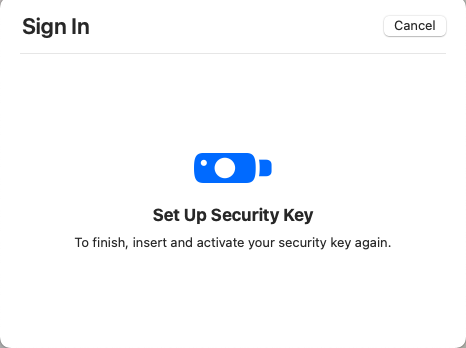
- You will be prompted to touch your security key again.
- Enter a name for this key. This is for your reference only and mostly used for those individuals who have multiple hardware tokens. Click ‘Next’ when done.

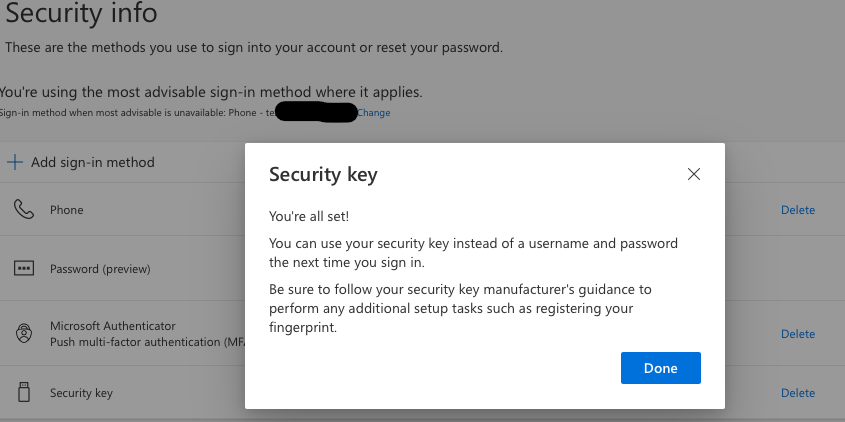
- You should see this message once its added, now you can click ‘Done’. Your Yubikey is now setup!

Removing a Hardware Token from your SIU / Microsoft Account
- Visit the Security Info Section of your office.siu.edu account or go directly to https://mysignins.microsoft.com/security-info
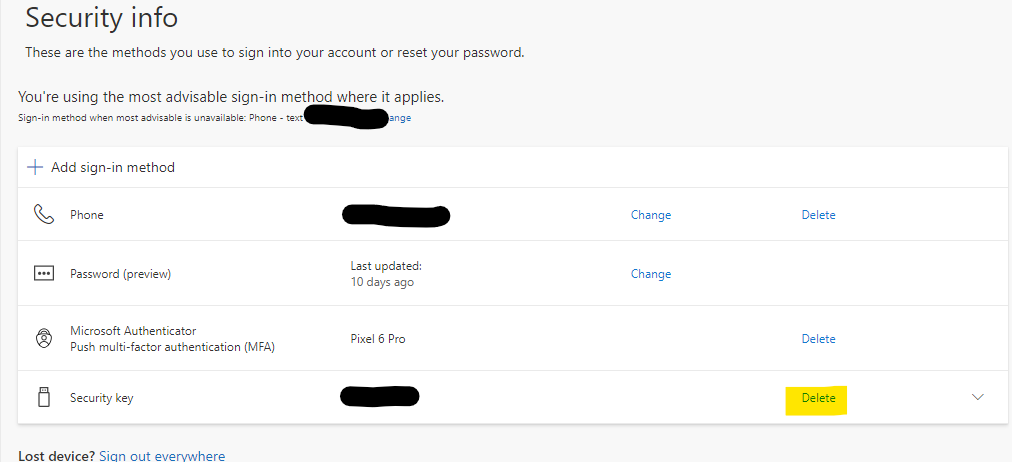
- Click the ‘Delete’ button next to the device(s) you want to remove.
- You may be prompted to Sign In to confirm deletion; if not, move on to Step 4.
[Note: You should have another device setup already to complete this step. If not, please reach out to SalukiTech].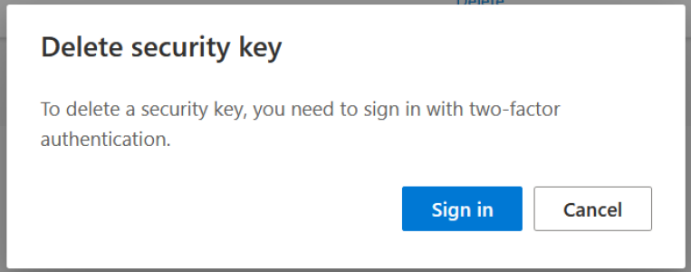
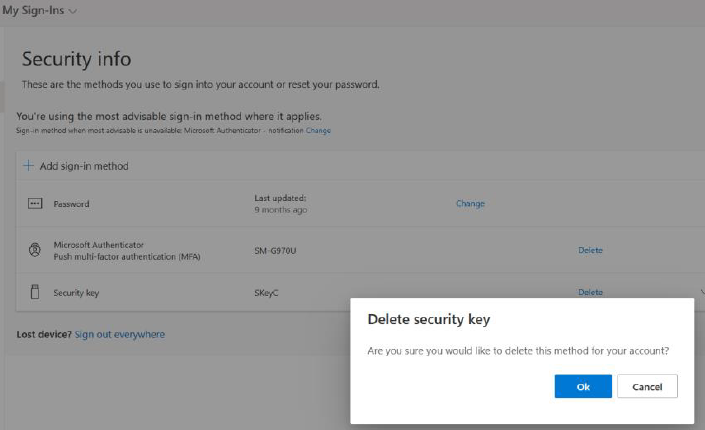
- Click ‘OK’ to confirm deletion.
Changing a PIN on a Mac for Yubikey / FIDO2 Devices
You must have the Yubikey Manager installed to complete this action, installation instructions are at the top of this guide.
- Click on ‘Launchpad’ on the Dock and look for Yubikey Manager icon, click on that to launch the software.
NOTE: You MUST run this software as an administrator!


- Once the Yubikey Manager software is open, insert the USB key in your computer, you will see some information about your key.
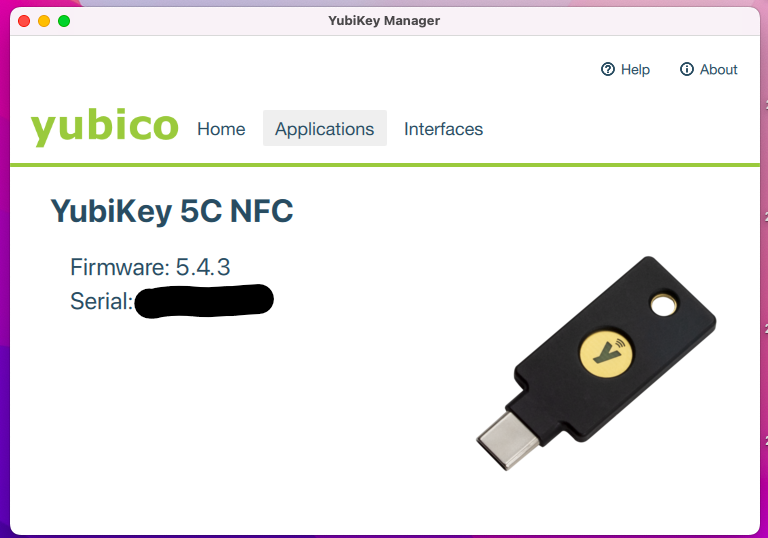
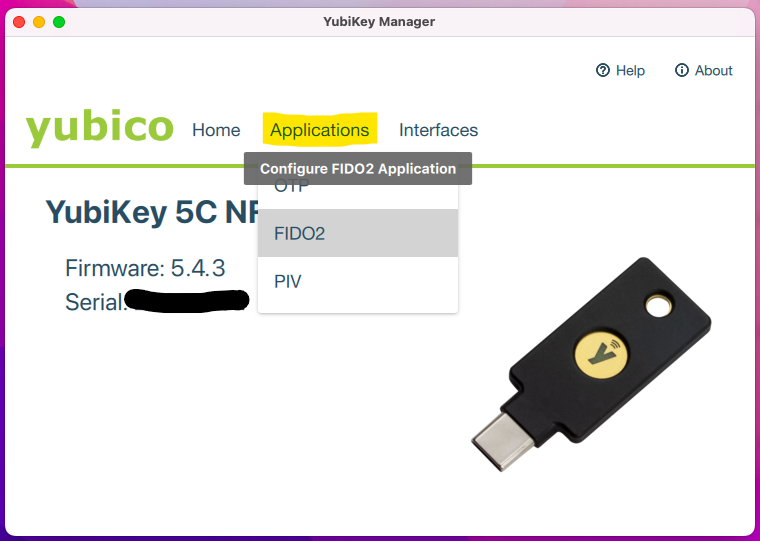
- On the ‘Applications’ tab select the ‘FIDO2’ option.
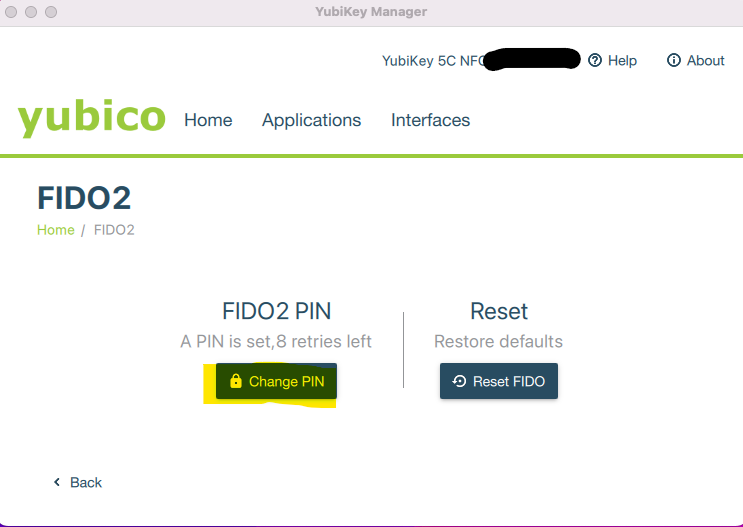
- Click on ‘Change PIN’. This is alphanumeric, meaning you can use letters or numbers and must be between 4 and 63 characters in length. SIU recommends a 6-character password for your Yubikey. This doesn’t have to be overly complex and should be something you can/will remember. Entering this wrong 8 or more times will reset the device.
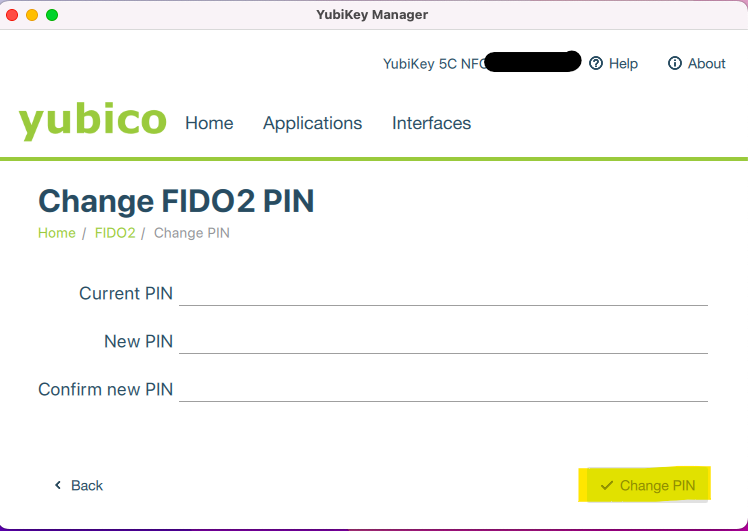
- You must input your Current PIN, then type the new PIN twice. Click ‘Change PIN’ to continue.
- A small pop-up at the bottom of the screen will confirm that your PIN is reset.
Resetting a PIN on a Mac for Yubikey / FIDO2 Devices
You must have the Yubikey Manager installed to complete this action, installation instructions are at the top of this guide
- Click on ‘Launchpad’ on the Dock and look for Yubikey Manager icon, click on that to launch the software.
NOTE: You MUST run this software as an administrator!


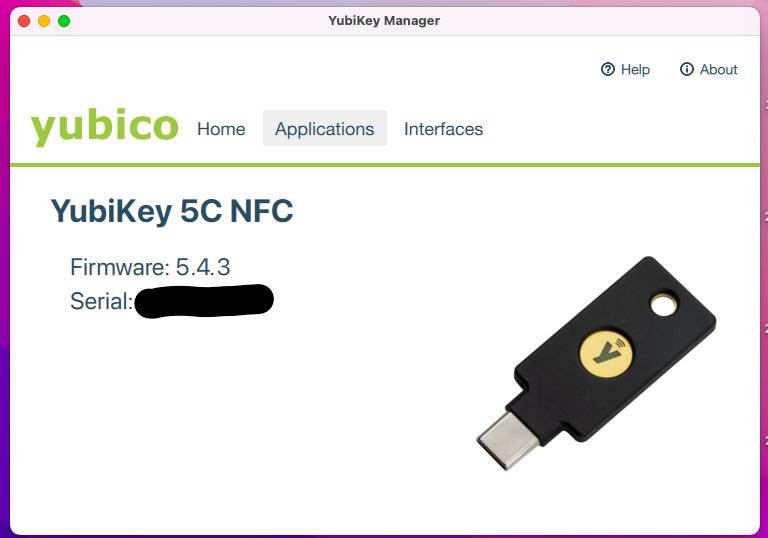
- Once the Yubikey Manager software is open insert the USB key in your computer, you will see some information about your key.
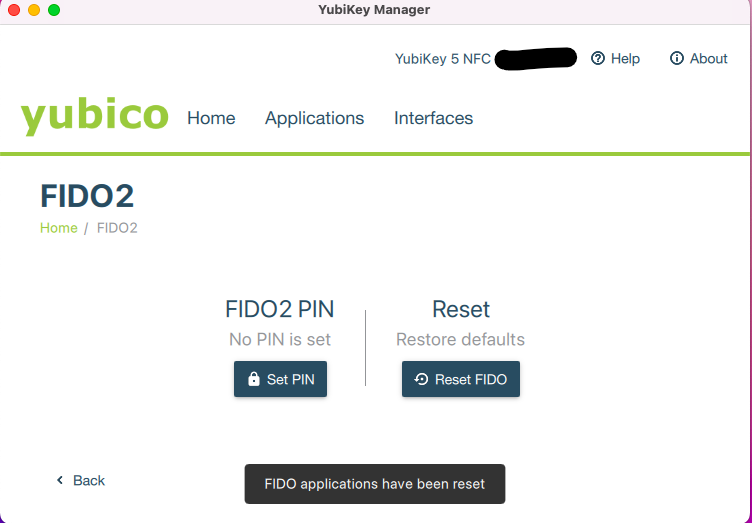
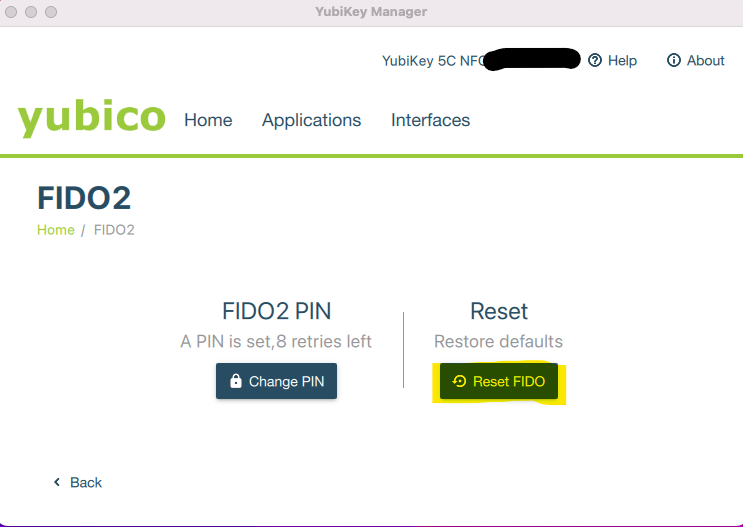
- Click on the ‘Reset FIDO’.
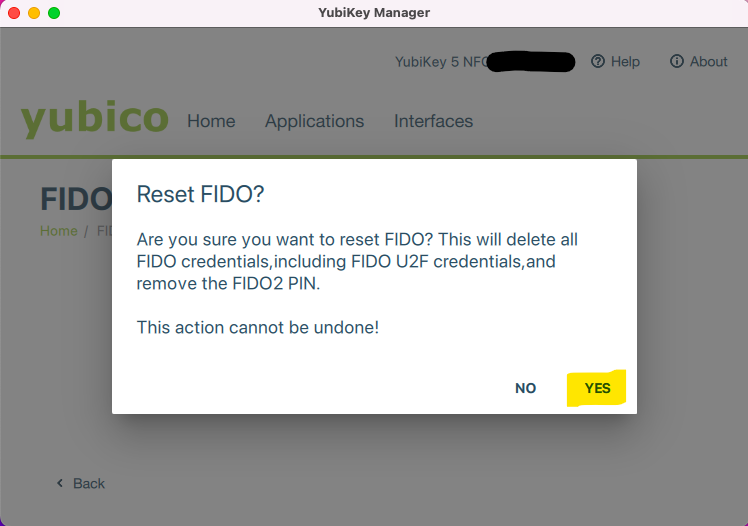
- You will be warned about the removal of FIDO credentials, Click ‘YES’.
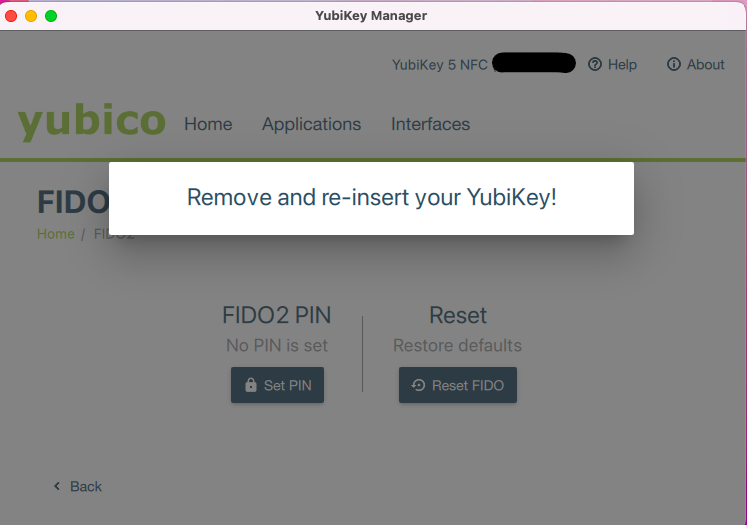
- You will be asked to remove and re-insert the Yubikey.
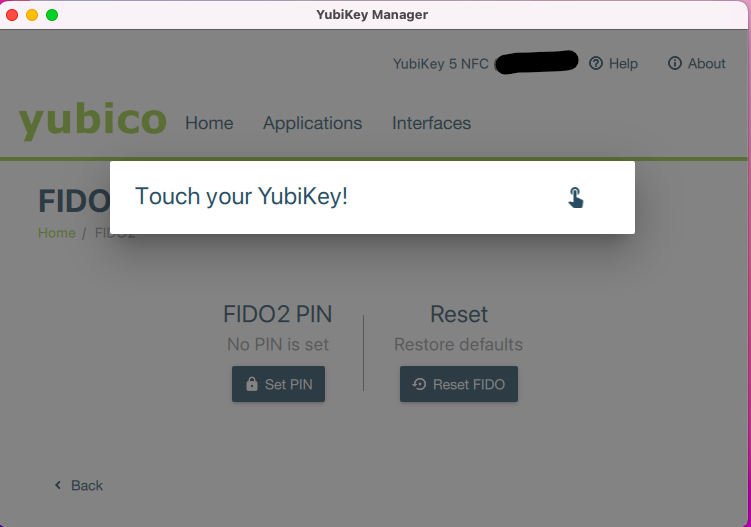
- Next, you need to touch the Yubikey to complete the reset process.
- A small pop-up at the bottom of the screen will confirm that your FIDO was reset.
