How Can We Help?
Troubleshooting projector issues in CLC classrooms
Checklist for resolving projector issues in the CLC classrooms with windows computers
All the podium computers (instructor workstations) in the CLC classrooms (Except Comm building) are Dell 7010 micro-PCs which allows for easier access to the computer video and audio outputs and gives a common configuration regardless of whether the projector type is a long throw or a short throw.
Basic common configuration: The Display Port video is connected to the Podium monitor (Monitor 1). The HDMI port video is connected to an HDMI switch (input 1) and will connect to the projector through the HDMI switch Output and be recognized by the PC as (Monitor 2) when the switch is set to the (input 1) position. The HDMI switch (input 2) is connected to an extra HDMI cable on the Podium side table for use with a laptop PC and must be switched to that position for the HDMI switch output to connect to the projector.
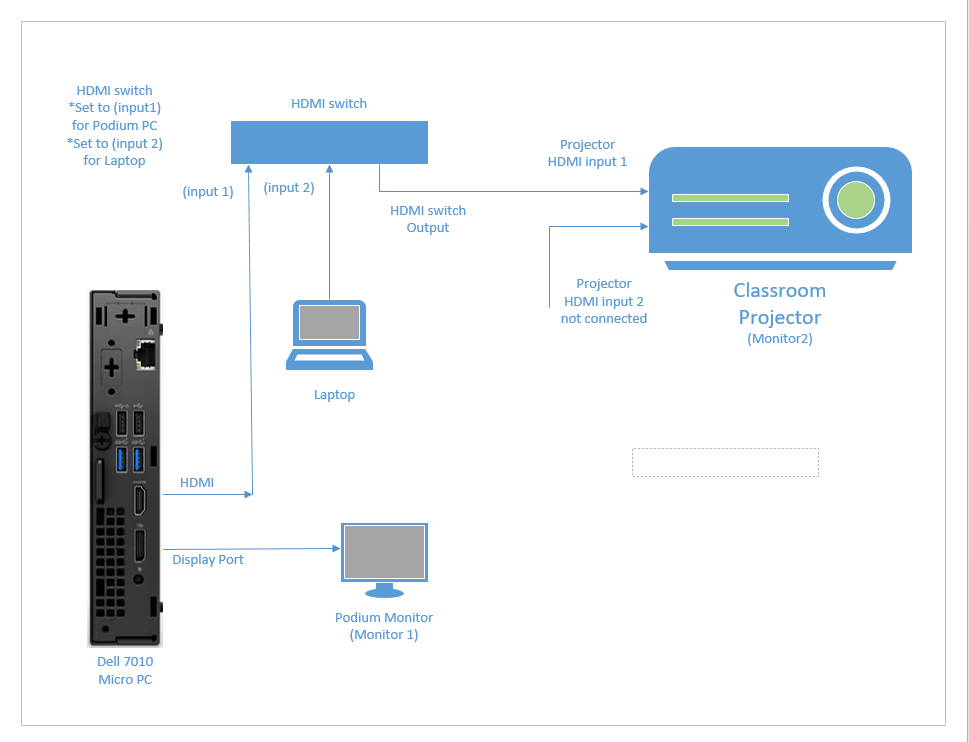
Now that we have a common configuration to work from, we can begin to develop a troubleshooting guide to systematically check all the individual parameters that may have changed to cause a problem. We begin this process with the understanding that the user of the system may have tried fixing the problem themselves before reporting the issue. By unplugging and changing connections, switching projector input sources and incorrectly changing desktop monitor settings on the PC. This can potentially be the original cause of the issue or exasperate and complicate an already existing problem. So, we will start at the projector and work our way back to the PC checking each connection and configuration setting to ensure our common configuration is in place as normal.
Step 1 Projector
- Does the projector power on using the remote and show normal indicator lights for power and lamp?
- If the projector does not power on
- Verify that the Remote is functioning with new batteries
- If it will not power on with a known good Remote or
- gives a blinking red lamp indicator contact Tier 2 support immediately
- If the projector does not power on
- Once the projector is on and projecting a blank screen use the Remote to check the input source through the projector menu. It needs to be set to HDMI 1. It will not display the signal coming from the switch when set to any other input source.
Step 2 HDMI Switch
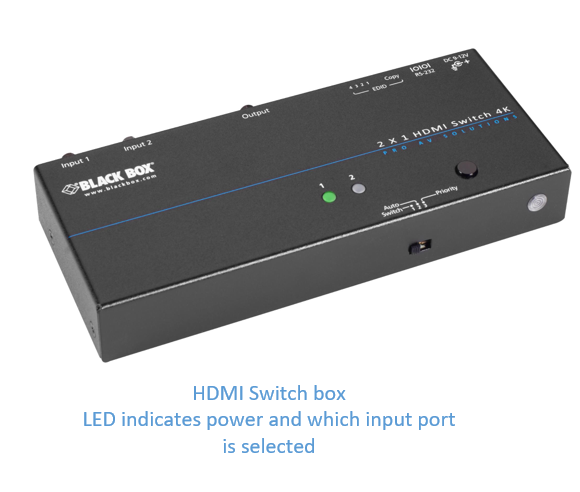
- Make sure the HDMI cable from the projector is firmly seated in the Switch output port.
- Make sure the HDMI cable from the Podium PC is firmly seated in the Switch (input 1) port.
- Make sure the HDMI extra cable for the laptop connection is seated in the Switch (input2) port.
- For the Podium PC the HDMI Switch should be on (input 1) selection, (input 2) for laptop
- Does the Switch have power?
- If it does not show that it has power from the LED indicator light, check the AC/DC power supply to make sure the AC adaptor is plugged into the power strip inside the podium (they do mysteriously become unplugged somehow) and the DC connector is firmly inserted into the Switch power connection port. If that does not restore power to the Switch, then it may have a bad power supply or the Switch itself may have a component failure. In any case contact Tier 2 support immediately.
*Note: If the Switch or power supply is bad then it can be by passed and the HDMI cable coming from the projector can be directly connected to the PC HDMI port until the Switch can be replaced.
If this is done still proceed to the next Step to check the PC Display settings.
Step 3. Podium Computer Dell 7010 Micro-Display settings
Computer Display settings are some of the most common issues we have seen recently with the Projector issues in the CLCs. The first two steps already covered, ensure the correct conditions to allow for adjusting the display settings properly and should be done first before doing the following.
- Check to make sure HDMI (input 1) cable is seated firmly into PC HDMI port
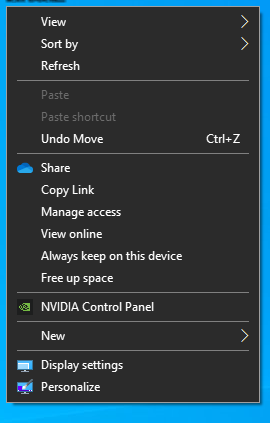
- If the instructor is currently logged onto the PC check the Display settings for multiple monitors. If not logged on you can log on with your NetID to perform the check.
Right-click on the desktop and select Display Settings
If set correctly it will show Monitor 1 PC and Monitor 2 projector set to Duplicate these displays .
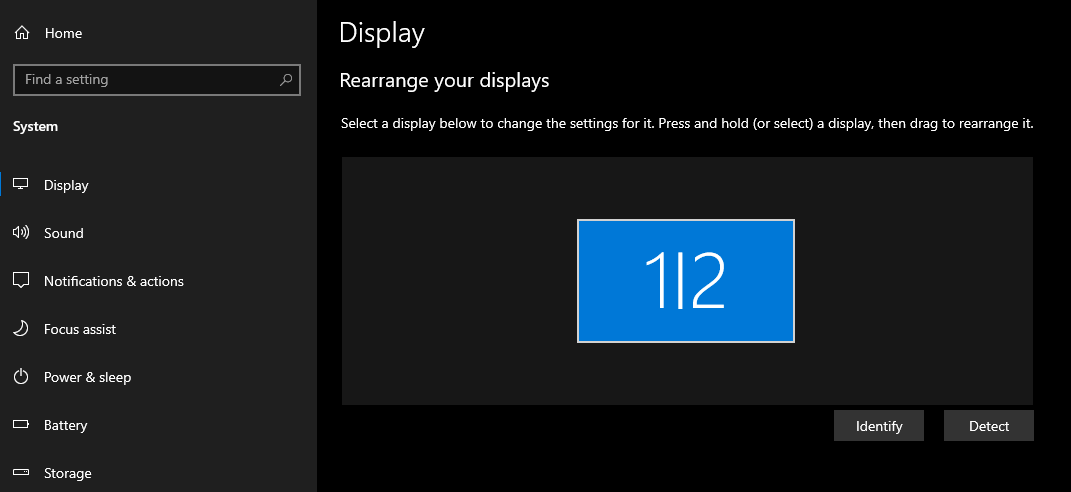
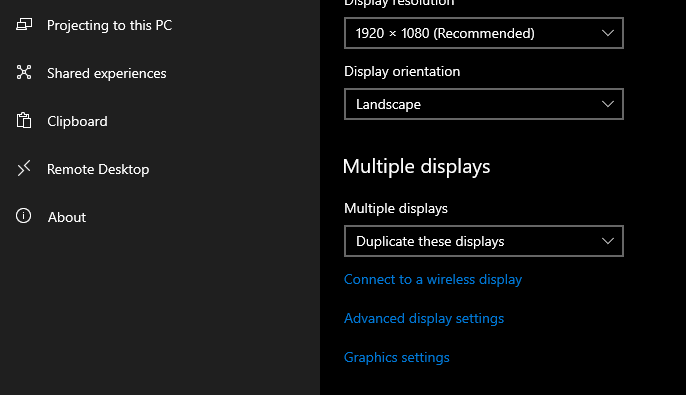
If it does not see two monitors, then unplug the HDMI cable from the PC and wait 10sec.
Then reconnect it to the port. This may wake up the port and revert to the desired setting, if not there is a problem with one of the HDMI cables and Tier 2 will need to trouble shoot, report to Tier 2 immediately.
This is what the setting will look like if it does not detect the projector.
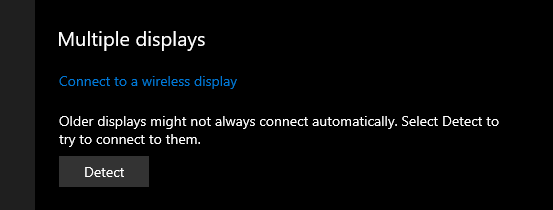
Another condition we frequently find is that when the Projector goes to sleep, it is turned off or the input to the projector is switched to the laptop connection and then switched back later. The Multiple display setting senses two monitors but reverts to only sending the output to the display port Monitor 1 only.
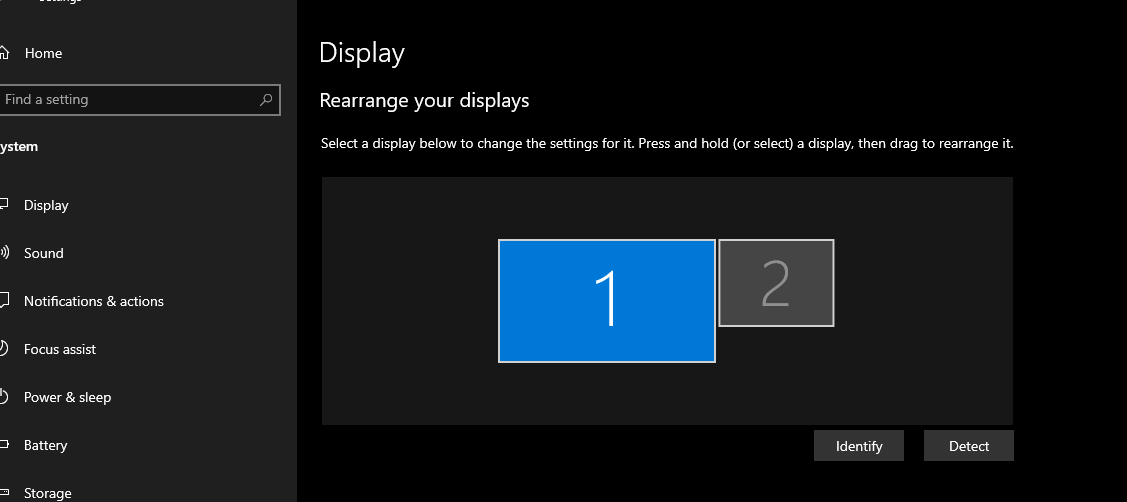
This can be quickly resolved by changing the setting to Duplicate these displays.
Following this guide will give CLC Lab tech staff the ability to troubleshoot 80 to 90% of the problems that are encountered with the CLC projection systems. In those cases where the issue cannot be resolved, Tier 2 support because of the steps that have already been taken will have a much better idea of where to start a more in-depth and advanced look at the problem. Tier 2 staff being a combination of CLC full-time technical staff and the Desktop Support team.
Checklist for resolving projector issues in the CLC classrooms with Mac computers (Communications Building Lab)
iMac Audio
Check the iMac’s audio connections and sound settings.
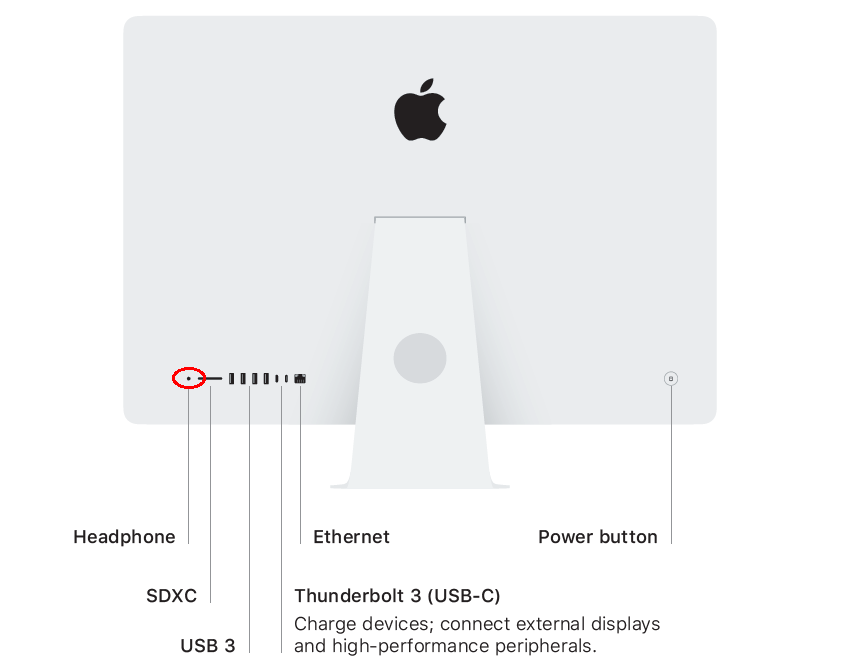
Rear Panel
- HEADPHONE PORT: Plug in the 3.5 mm (1/8″) stereo cable.
Sound Settings
- OIUTPUT DEVICE: Select Headphones.
- OUTPUT VOLUME: Raise the volume to max and unmute the output.
- BALANCE: Center the balance.

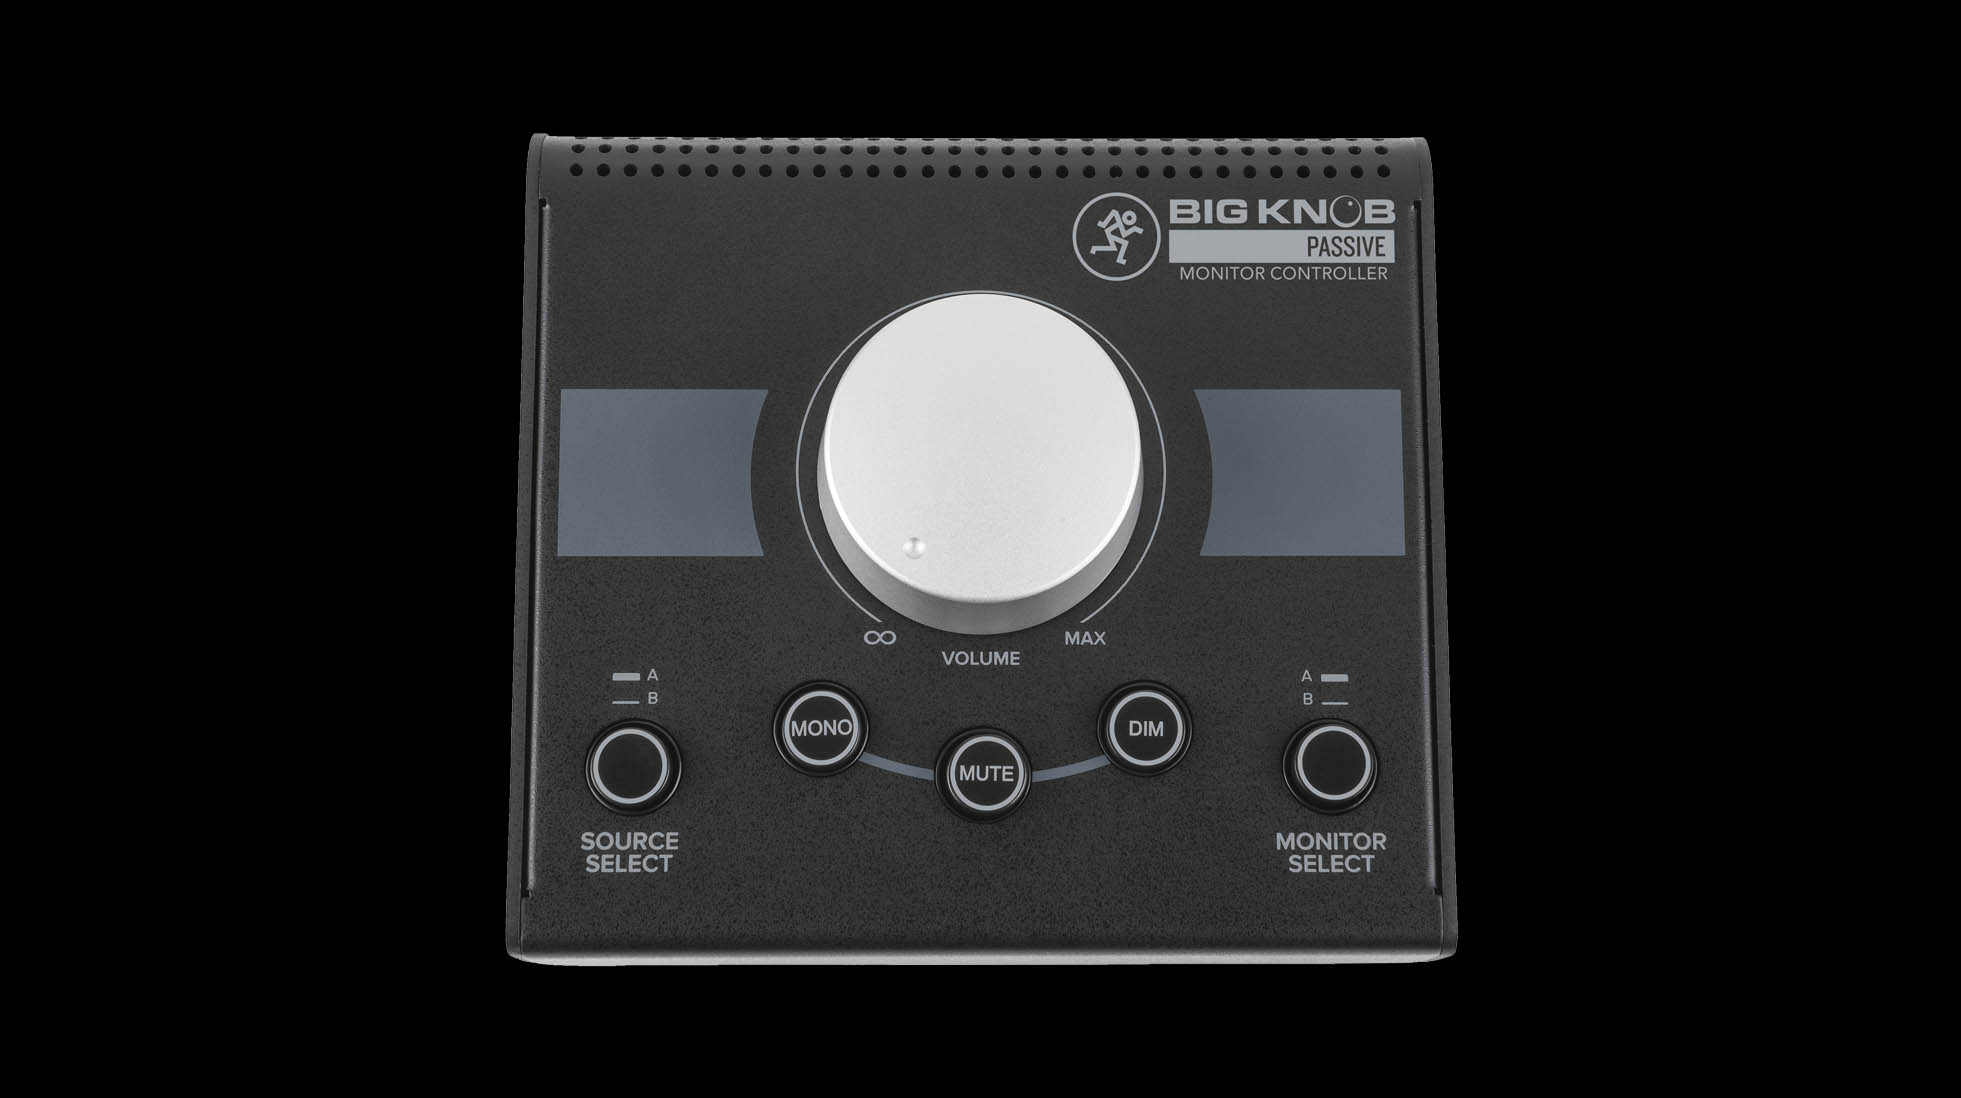
Audio Monitor Controller
Check the audio monitor controller’s connections and settings.
Front Panel
- VOLUME: Turn the volume knob to at least 50%.
- SOURCE SELECT: Select Source A (button up) for iMac sound or Source B (button down) for laptop sound.
- MONO: Turn off (button up).
- MUTE: Turn off (button up).
- DIM: Turn off (button up).
- MONITOR SELECT: Select Monitor A (button up).
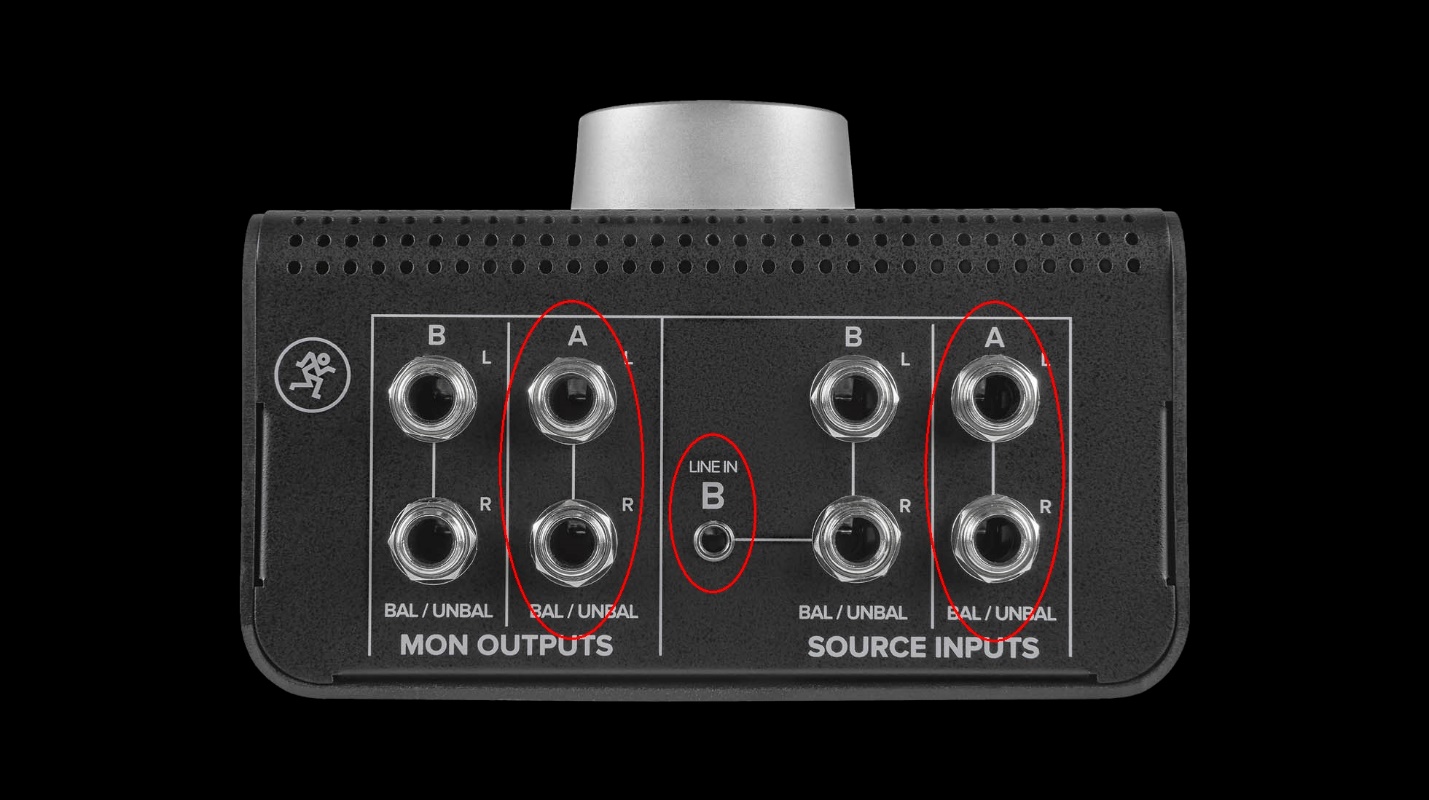
Rear Panel
- SOURCE INPUT A: Plug in the gray (left) and red (right) 1/4″ TS Y-cable.
- SOURCE INPUT B (LINE IN): Plug in the 3.5 mm (1/8″) stereo cable.
- MON OUTPUT A: Plug in the silver left and right 1/4″ TRS cables.
Speakers
Power on all three speakers (left, right, and subwoofer), then adjust the volume.
Front Panel
- POWER: Press the power button to turn on the speaker.
- VOLUME: Use the + button to raise the volume to max.

iMac Video
Check the iMac’s video connections and display settings.
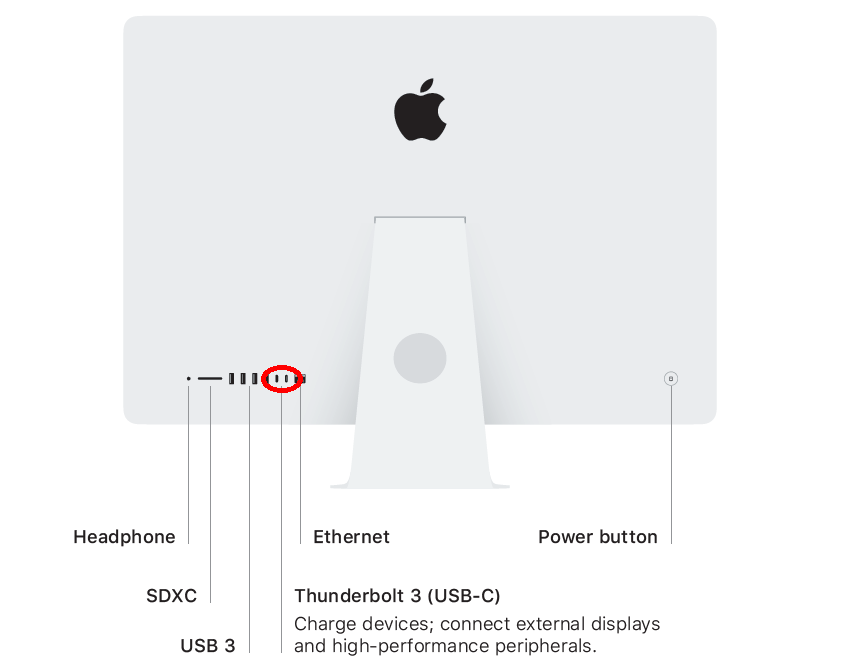
REAR PANEL
- thunderbolt 3 (USB-C) port: Plug the HDMI adapter into the iMac’s Thunderbolt 3 (USB-C) port. If there’s no video from one port, try the other port.
- HDMI adapter: Plug one end of the HDMI cable into the video adapter port.
- HDMI Transmitter (9A & 9E Only): Plug the other end of the HDMI cable into the HDMI over Cat5e transmitter. Do not touch the network cables on the transmitter!
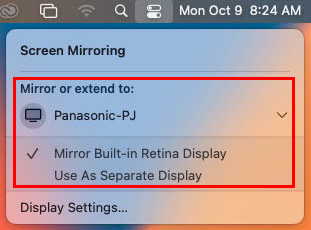
Screen Mirroring Settings
- Mirror or extend to Panasonic-PJ: Select Mirror Built-in Retina Display.
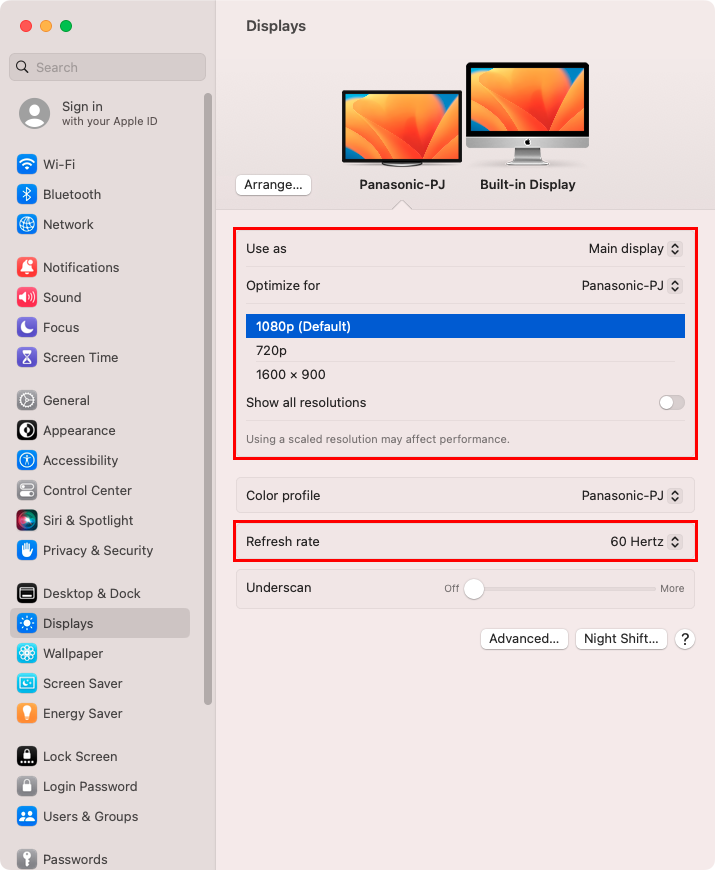
Display Settings (Panasonic-PJ)
- Use as: Select Main display.
- Optimize for: Select Panasonic-PJ.
- Resolution: Select 1080p (Default).
- Refresh rate: Select 60 Hertz.
Display Settings (Built-in Display)
- Use as: Select Mirror for Panasonic-PJ.
- Optimize for: Select Panasonic-PJ.
- Brightness: Adjust the brightness, if needed.

Projector
Check the projector’s connections and settings.
REAR PANEL
- POWER: Plug in the AC power cord.
- MAIN POWER: Switch to On.
- HDMI IN 1: Plug in the HDMI cable.
remote control/side PANEL
- POWER: Turn on the projector.
- INPUT SELECT: Select HDMI 1.
front PANEL
- Note any red or blinking power, lamp, or temperature lights while the projector is in use.
SCREEN
- Note any warning messages like Replace Lamp.
