How Can We Help?
Connecting to Eduroam with Windows
Automatic Setup
The preferred way of setting up the eduroam SSID on any operating system is connecting to the wireless network “eduroam-instructions” then downloading the cloudpath utility that can be found at https://setup.wifi.siu.edu. The utility sets up the SSID automatically with little input from you.
For users in the residence halls, use this link to automatically setup the wireless networks: https://housing.wifi.siu.edu
Windows 11
Manual Setup
- Select the network icon in the taskbar at the bottom right

2. Click on the > arrow next to the Wi-Fi symbol.
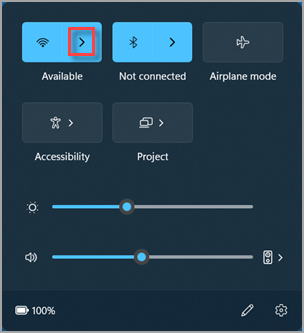
3.Choose “eduroam” from the list of networks
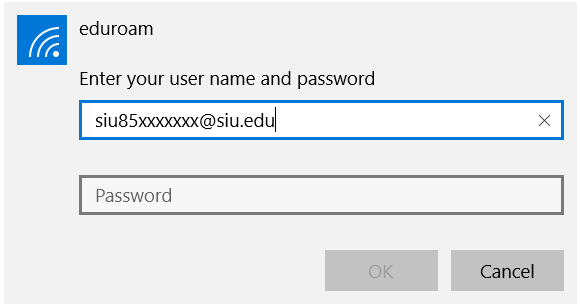
4. Enter in your credentials. Your user name will be your network id with @siu.edu at the end. Your password will be the same one you use for signing into salukinet/email/etc.
Forgetting the eduroam network/profile on windows 11
Follow the steps above to open up the list of available wireless networks. Right click on “eduroam” from the list and select “forget”.
Windows 10
Manual Setup
1. Click on the Network symbol on the bottom right corner to bring up Networks.

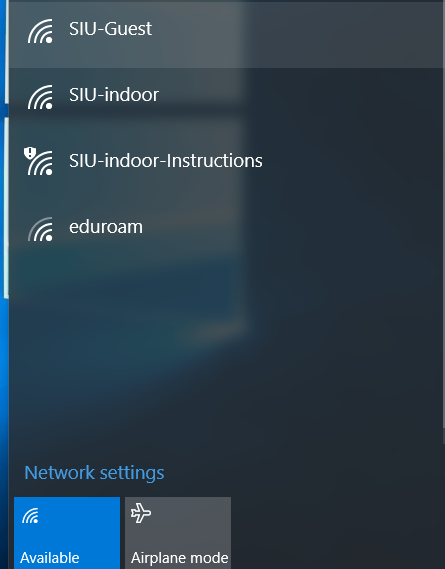
2. Once this panel has opened, select eduroam, then click Connect.
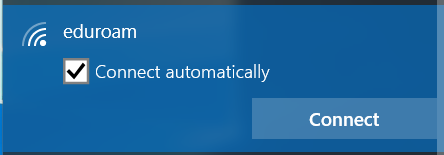
3. Enter your SIU credentials, your username need to have @siu.edu at the end. (eg. siu85xxxxxxx@siu.edu). Enter your password. Click OK.

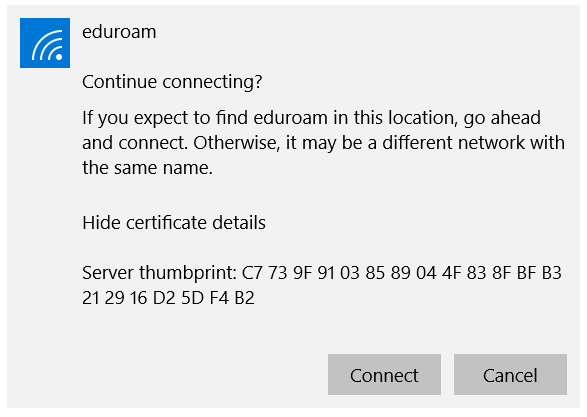
5. If this is your first time connecting you will be prompted with this warning. Click Connect.
6. You will see this if you are successfully connected.

NOTE: Any device that doesn’t support WPA2-Enterprise wireless security or 802.1x wireless security will not be able to connect to the SIU Indoor Wireless Network. Click here to view unsupported devices on our network.
Forgetting the eduroam network/profile on windows 10
Method 1
Click on the wireless icon in the taskbar at the bottom right. Right click on the network named “eduroam” and select “forget this network”
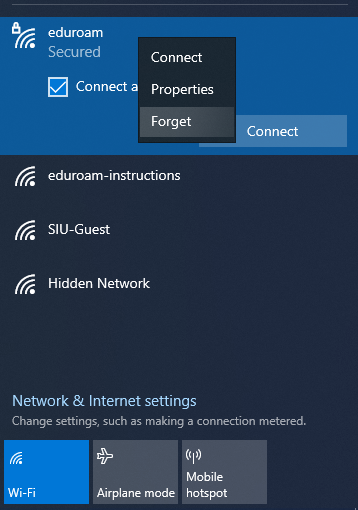
Method 2
- In the System Tray in the lower right-hand corner of the screen click on the Network icon.
- Click the Network & Internet Settings link.
- In the Settings screen, click the Wi-Fi link from the left-hand side of the screen.
- On the right-hand screen, click the Manage known networks link.
- In the Wi-Fi screen, select the network to be removed and click the Forget button.
- Click the X in the upper right-hand corner to close the screen.
Windows 8.1
NOTE: Windows 8 support ended on January 12, 2016 and support for windows 8.1 will end January 10, 2023. Windows 8.1 may not be able to connect to eduroam networks after this date due to outdated security on devices running this operating system.
Manual Setup
1. From the Desktop, right-click on the wireless icon: and select Open Network and Sharing Centre.

2. Select Set up a new connection or network

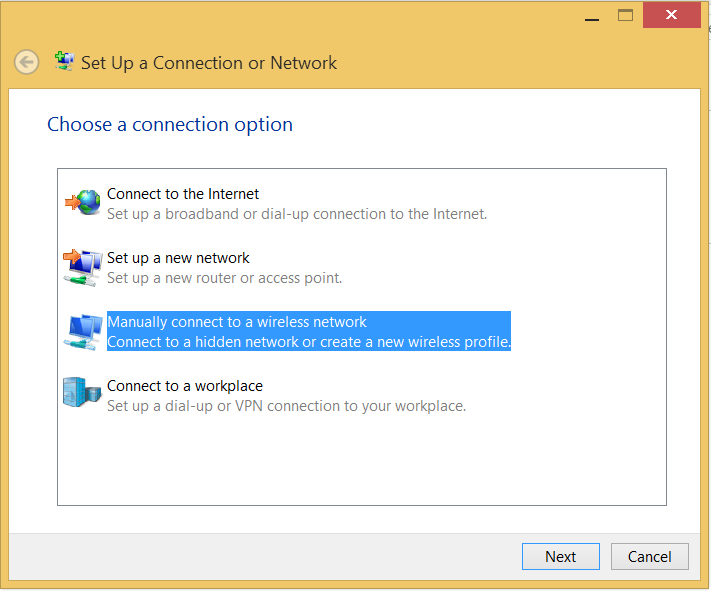
3. From the connection options, select Manually connect to a wireless network.
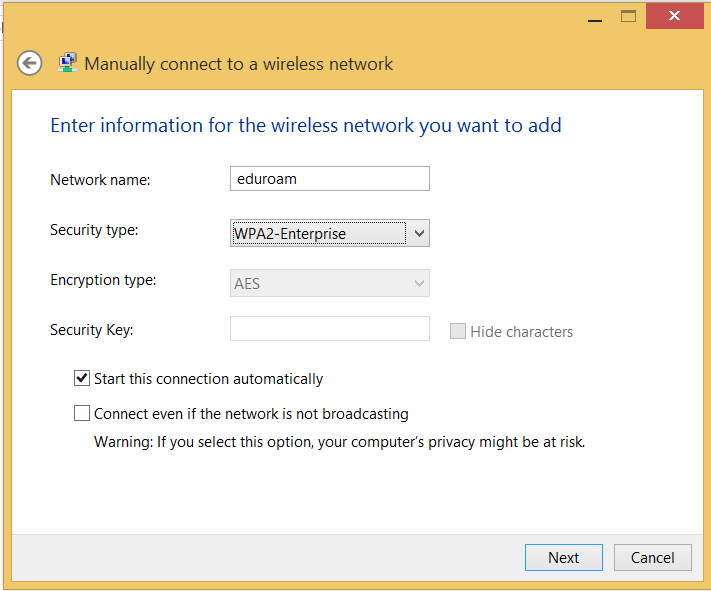
4. Enter “eduroam” as the Network Name and select WPA2 Enterprise for the Security Type. Ensure Start this connection automatically is enabled. The Connect even if the network is not broadcasting box unticked.
5. Click Next to save your profile.
6. Once successfully added, Click “Change connection settings”.
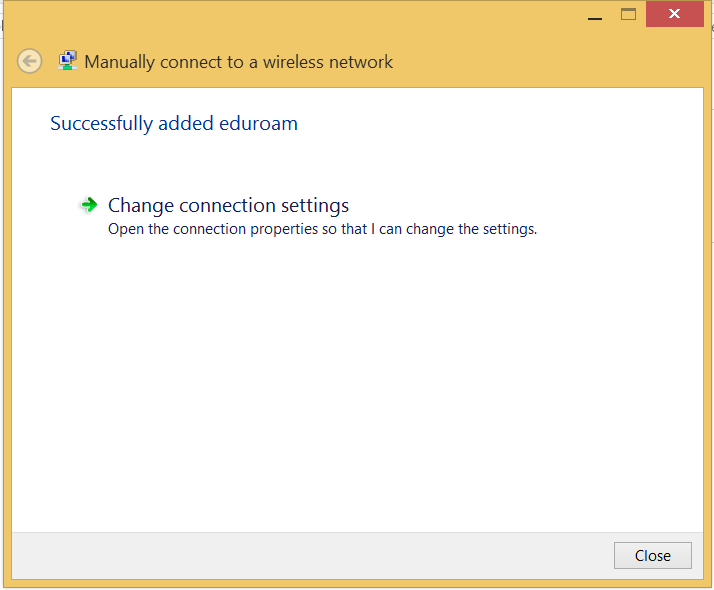
7. Click the Security tab

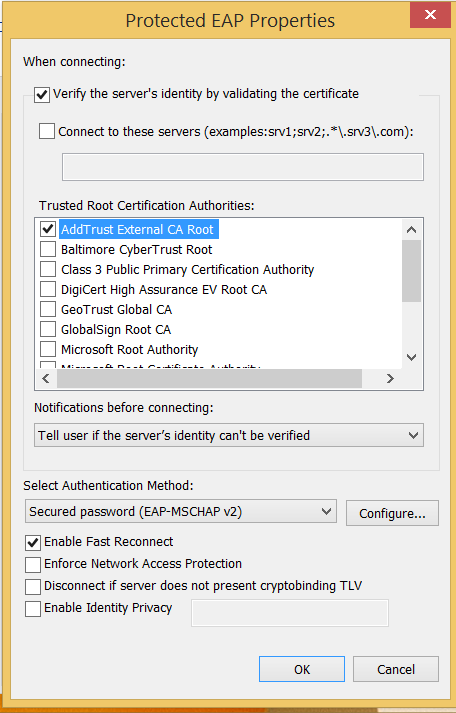
8. Click Settings Next to “Microsoft: Protected EAP (PEAP)”
9. Ensure “Verify the server’s identity by validating the certificate” is checked. Check the box next to “AddTrust External CA Root”. If that authority is not available check “USERTrust RSA Certification Authority”. If neither of those are available you should be able to uncheck “Verify the server’s identity by validating the certificate” at the top of the window.
Click OK Twice.
10. Click Close.
11. You may need to invoke the wireless connection. From the Desktop, click on the wireless icon and select eduroam. Connect automatically should be ticked. Select Connect.
Forgetting the Eduroam network/profile on Windows 8
Method 1
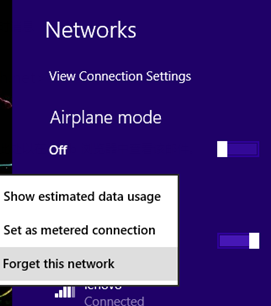
Click on the wireless icon in the taskbar at the bottom right. Right click on the network named “eduroam” and select “forget this network”
Method 2
Open Command Prompt by swiping in from the right edge of the screen, tapping Search (or if you’re using a mouse, pointing to the upper-right corner of the screen, moving the mouse pointer down, and then clicking Search), entering ‘Command Prompt’ in the search box, and then tapping or clicking Command Prompt. At the prompt, type:
netsh wlan delete profile name=eduroam
Windows 7 (No Longer Supported)
Windows 7 lacks the security required to connect to the eduroam network and we can no longer offer support for getting windows 7 computers connected to eduroam.
Troubleshooting
For troubleshooting eduroam issues on windows devices please see our guide here: https://oitkb.siu.edu/knowledge-base/troubleshooting-eduroam-for-windows-devices/
