
How Can We Help?
-
Featured Issues
KB articles focusing on current problems and critical resolutions.
- Adding a Sharp Printer to a Personal Computer
- Adobe Sign in Acrobat Pro Basics
- Class Technology Troubleshooting
- Connecting to SIU Limited a Smart Device or Game Console
- Emergency Alerts
- Firewall Rule Request in Tikit
- Force Chrome and Edge to Download PDF Forms
- Force Microsoft Edge to Open a PDF Externally
- How do I print on campus?
- How to use User Codes with GFI Sharp Multi-function Printers
- I'm not receiving the email to reset my password from HRSS
- Making Calls in Microsoft Teams
- Proxy Account Setup
- Requesting D2L Brightspace and Instructional Support Services from CTE
- Requesting Software
- Self Service Registration Guide
- SIUC LastPass
- Student Proxy Setup
- Using Quick Assist
- Using VDI Computers on Campus
- Virtual Desktop Infrastructure (VDI) Guide
- Show all articles ( 18 ) Collapse Articles
-
Microsoft 365
Support topics related to Office365, and Microsoft Products
-
- Availability in Microsoft Teams
- Create a Microsoft Team for My D2L Course
- Download Teams on your Mobile Device
- Factory Reset Yealink MP54
- How to install Microsoft Teams on Iphone or Android
- Join Class Meeting on Teams
- Making Calls in Microsoft Teams
- Microphone doesn't work in Microsoft Teams
- Microsoft Teams Guide
- Scheduling Class Meetings in Teams
- Share a File with Microsoft Teams
- Sync Teams Channel Folder to One Drive on Local Device
- Teams Live Events
- Toggle Call Queues in Microsoft Teams
- Show all articles ( 11 ) Collapse Articles
- Access a Video File in Microsoft Stream
- Accessibility Checker in Microsoft Office
- Add a Delegate from O365 Web App
- Add your Office 365 Account to Outlook
- Blocked Email
- Clearing the Outlook Autocomplete E-mail Cache
- Create a Microsoft Form
- How do I add audio to my PowerPoint?
- How to check my M365 mailbox usage?
- How to install Office 365 from Software Center on SIU owned computers.
- Identifying and Reporting Email Scams
- Logging into Microsoft Forms
- Manage Share Settings in Microsoft Stream
- Microsoft Authenticator for current Students, Faculty & Staff
- Microsoft Authenticator for Retirees & Alumni
- Microsoft Bookings Guide
- Microsoft FindTime
- Microsoft Office Training and Support
- Microsoft Stream Recording/Sharing Processes
- Microsoft Word Guide
- My OneDrive Icon is Missing
- Office 365 for Android Devices
- Office 365 for iOS Devices
- Office 365 for Other Devices
- Office 365 for Windows Devices
- Office365 won't open .ics file
- OneNote Help & Training
- Remove Contact from Office 365
- Request a Room for Outlook/Teams Meetings
- Share a File with Microsoft Teams
- Share a File with OneDrive
- Share a Video File in Microsoft Stream
- Shared Mailbox
- SIU Email Access
- SIU Email Signature Instructions
- Upload a File to Microsoft Stream
- Upload a File to OneDrive
- Video Chapters in Microsoft Stream
- Video Comment in Microsoft Stream
- Video Information in Microsoft Stream
- Video Thumbnail in Microsoft Stream
- Video Transcript in Microsoft Stream
- Virtual Fax Instructions
- Show all articles ( 40 ) Collapse Articles
-
-
D2L Brightspace
- Adding a Link In Announcement to Content
- Adding a Participant to Course in D2L
- Adding a Teaching Assistant (TA) to Course in D2L
- Adding You-Attend for Attendance in D2L
- Brightspace Training Sessions
- Change Course Offering Information in D2L
- Copy Your Course Content from Previous Semester in D2L
- Create a Microsoft Team for My D2L Course
- Creating Break-Out Group Discussion Boards
- Creating Discussions in D2L (MyCourses)
- Creating/Editing Announcements in D2L (MyCourses)
- D2L Course Merge Guide
- D2L Intelligent Agents
- D2L Quick Guide: Using the Course Builder Tool
- Display Current Courses on D2L Course Homepage
- Echo 360 Instructor Guide
- Echo 360 Video Won't Play on Chromebook
- Emailing the Class in D2L (MyCourses)
- Formatting Guidelines for Respondus 4.0 Exam Converter
- Getting Help with D2L
- Getting Started with Creator + in D2L
- Give Students Special Access to Course Quiz in D2L
- Grading Tool in D2L (MyCourses)
- How do I randomize quiz questions in D2L?
- How to Access Quiz Feedback on D2L
- How to Add Instructor Profile on D2L Course Homepage
- How to Add Resources for Salukis Widget to a D2L Course Homepage
- How to Add Upload Content to your Course
- How to Attend a Virtual Classroom Session
- How to change course navigation from menu bar (list) to icon-based
- How to Change Participant Roles in D2L
- How to Create a Video Assignment in D2L
- How to Create Assignments in D2L
- How to Display Quiz Feedback on D2L
- How to Email Instructor and Classmates in D2L
- How to Get Started with Virtual Classrooms in D2L
- How to Give Students Special Access to Course Assignment in D2L
- How to Login and Navigate a course in D2L
- How to post a quiz with time restriction in D2L
- How to Post on Discussion Boards in D2L
- How to Set-up Notifications in D2L (students/learners)
- How to Take Quizzes in D2L
- How to Upload Assignments in D2L
- How to Use D2L Content
- How to Use D2L on Your iPhone or iPad
- How to Use D2L on Your Laptop
- Import a Course from Another Learning Management System
- LockDown Browser and Respondus Monitor Instructor Guide
- Lockdown Browser Guide for Students
- Readspeaker in D2L
- Requesting D2L Brightspace and Instructional Support Services from CTE
- Setting Up Assignments and Linking to the Gradebook in D2L (MyCourses)
- SIU Live Recording
- This Quick Guide will help you learn How to Add a Participant to Course in D2L
- Update your profile picture in D2L Brightspace
- Using CopyLeaks in D2L
- Using Respondus 4 with VDI
- Work to Do Widget in D2L
- Show all articles ( 55 ) Collapse Articles
-
Account Help
Login support for all SIU accounts.
- Account Lockouts
- AIS reports not opening with Word
- BigDawg Access
- Changing Display Settings in Windows
- Changing Preferred First Name or Email Address
- Claim your Network ID
- Connecting to Eduroam with Mac OSX
- Departmental ID or Out-of-band (OOB) Network ID Account
- Emergency Alerts
- How do I access my SIU email?
- How Do I Change My SIU Account Password?
- How to add a shortcut in file explorer to a OneDrive folder
- How to sign into a Teams Phone
- How to Update Your Recovery Information
- How to View Telecom Billing
- Instructions for changing database connections in Golden
- Microsoft Authenticator for current Students, Faculty & Staff
- Microsoft Authenticator for Retirees & Alumni
- Office 365 - Modify members of a distribution list (OWA)
- Passwordless MFA Sign-in (Android)
- Proxy Account Setup
- SalukiNet Proxy FAQ's for Students
- Setting up a Network ID account for a Local Administrator
- SIU Email Access
- SIU Network ID-General Information
- SIUC LastPass
- Student Proxy Setup
- Troubleshooting the Housing Portal
- Using the Electronic Whiteboard and Document Camera
- What is my SIU email address?
- Yubikey Hardware Device Instructions - MacOSX
- Yubikey Hardware Device Instructions - Windows
- Yubikey Hardware Instructions - Linux
- Show all articles ( 30 ) Collapse Articles
-
Remote Access
Access to SIU's VPN, Remote Desktop Access, and Virtual Desktop Instances.
-
WiFi and Internet
Network and Internet connectivity issues, for SIU supported networks and off-campus SIU device connectivity.
- Account Lockouts
- Connecting to Eduroam with Android devices
- Connecting to Eduroam with Apple Iphone or Ipad
- Connecting to Eduroam with Linux
- Connecting to Eduroam with Windows
- Connecting to SIU Limited a Smart Device or Game Console
- Connecting to SIU-Guest
- Eduroam Support for Older Devices
- How do I clear my browser cache and cookies?
- Secure a Compromised Email Account
- SIU Wireless Connection Guide
- Troubleshooting Eduroam for IOS devices
- Troubleshooting Eduroam for Mac devices
- Troubleshooting Eduroam for Windows Devices
- Show all articles ( 11 ) Collapse Articles
-
SIU Digital Services
Support for online resources, such as MoveIT, HRSS, SalukiNet, and more.
- AIS PDF authentication error
- AIS reports not opening with Word
- Golden Software Help
- How to Obtain an Unofficial Transcript
- Instructions for changing database connections in Golden
- Lockdown Browser Guide for Students
- MOVEit User Guide
- Setting Up a Google Analytics Account with an SIU Email Address
- Setup Weekly Identity Scan for Spirion
- Spirion Identity Finder
- Working Remotely
- Show all articles ( 8 ) Collapse Articles
-
Computer Help
General SIU Computer Topics
- Adding a Sharp Printer to a Personal Computer
- Apple/Mac, Big Sur OS Breaks AIS Report Viewing/Printing
- Blue Screen Printing Fix
- Class Technology Troubleshooting
- Connecting to SIU Limited a Smart Device or Game Console
- Finding Computer Name on a Mac
- Finding Computer Name on Windows
- Force Chrome and Edge to Download PDF Forms
- Force Microsoft Edge to Open a PDF Externally
- How do I clear my browser cache and cookies?
- How do I open a private web browser window?
- Learn about ithelp portal
- Local Repair Facilities
- MOVEit User Guide
- Restoring Firefox Bookmarks
- Secure a Compromised Email Account
- Setup Weekly Identity Scan for Spirion
- SIU Email Signature Instructions
- SIU Live Recording
- SIU VPN Guide
- Troubleshooting projector issues in CLC classrooms
- Using Quick Assist
- What computer should I buy?
- Working Remotely
- Show all articles ( 21 ) Collapse Articles
-
FAQs
Category description
- Adding a Sharp Printer to a Personal Computer
- Changing Preferred First Name or Email Address
- Golden Software Help
- How do faculty enter grades?
- How to get service or order supplies for your GFI Copier/Printer
- How to register for classes on mobile
- How to Use D2L on Your iPhone or iPad
- How to Use D2L on Your Laptop
- How to use the Microfilm Scanner at Morris Library
- How to use User Codes with GFI Sharp Multi-function Printers
- I received an email titled "Action Required: Renew (course info)(semester) by (expiration date)"
- Identifying and Reporting Email Scams
- Mapping a Network Drive
- Microsoft Company Portal
- PDF not opening with Adobe
- Rebooting The KIC Book Scanner
- SalukiNet Proxy FAQ's for Students
- Self Service Registration Guide
- SIU Email Access
- Unable to Sign into myfuture.siu.edu to Submit Application or Sign Up for Orientation
- What computer should I buy?
- What is my SIU email address?
- Show all articles ( 19 ) Collapse Articles
-
Mobile Device Support
A collection of topics for mobile devices like phones and tablets.
- Connecting to Eduroam with Android devices
- Download Teams on your Mobile Device
- Emergency Alerts
- How to install Microsoft Teams on Iphone or Android
- Microsoft Authenticator for current Students, Faculty & Staff
- Obtain access to a shared network file share via SMB on a iOS device.
- Office 365 for Android Devices
- Office 365 for iOS Devices
- Office 365 for Other Devices
- Passwordless MFA Sign-in (Android)
- Troubleshooting Eduroam for IOS devices
- Show all articles ( 8 ) Collapse Articles
-
Campus Printing
How to print on the Carbondale campus including mobile printing resources and from SIU equipment.
-
Software Guides
Support for SIU distributed software offerings.
- Activate Wolfram Mathematica
- Adobe Acrobat Pro - Adding a Checkbox (with Either/or Options)
- Adobe Fonts
- Adobe Freezes While Adding Signature
- Adobe Sign in Acrobat Pro Basics
- Adobe Signature Box Fix - non-Entrust
- Create a survey with SurveyMonkey
- EMS Desktop Client Installation
- ERDAS IMAGINE 2022: Installation
- ERDAS IMAGINE 2022: Manual Installation
- Finding Computer Name on a Mac
- Finding Computer Name on Windows
- Google Career Certificates and AI Essentials
- Install Adobe Acrobat on Your Personal Computer
- Install Adobe Creative Cloud
- Install ArcGIS CityEngine on Your Personal Computer
- Install ArcGIS Drone2Map on Your Personal Computer
- Install ArcGIS Pro on Your Personal Computer
- Install Autodesk Software on Your Personal Computer
- Install EndNote on Your Personal Computer
- Install JMP Pro on Your Personal Computer
- Install JMP Student Edition on Your Personal Computer
- Install MATLAB on Your Personal Computer
- Install Microsoft 365 Apps (Microsoft Office) on Your Personal Computer
- Install Microsoft Azure Dev Tools for Teaching on Your Personal Computer
- Install SPSS Statistics on Your Personal Computer
- Install Wolfram Mathematica on Your Personal Computer
- Microsoft Company Portal
- Microsoft Software Center
- PDF not opening with Adobe
- Qualtrics
- Requesting Software
- SAS 9.4M7 for Windows: Manual Installation
- SAS 9.4M8: Installation
- Sign In Adobe Acrobat Sign
- Sign In Adobe Express
- Sign in Adobe Firefly
- Sign In Adobe Stock
- Sign In ArcGIS Field Maps
- Sign in ArcGIS Online
- Sign in ArcGIS QuickCapture
- Sign In ArcGIS Survey123
- Sign In MATLAB Academy
- Sign In MATLAB Drive
- Sign In MATLAB Mobile
- Sign In MATLAB Online
- Sign In Simulink Online
- Sign In/Activate Adobe Acrobat
- Sign In/Activate Adobe Creative Cloud
- Sign In/Activate ArcGIS CityEngine
- Sign In/Activate ArcGIS Drone2Map
- Sign In/Activate ArcGIS Pro
- Sign In/Activate JMP Student Edition
- Sign In/Activate MATLAB
- Sign In/Activate Microsoft 365 Apps (Microsoft Office)
- SurveyMonkey
- Update MATLAB License
- Using VDI Computers on Campus
- Virtual Desktop Infrastructure (VDI) Guide
- Show all articles ( 56 ) Collapse Articles
-
Classroom Technology
KB articles focusing on the technology within SIU's smart classrooms
Install ArcGIS Pro on Your Personal Computer
5 out Of 5 Stars
1 rating
| 5 Stars | 100% | |
| 4 Stars | 0% | |
| 3 Stars | 0% | |
| 2 Stars | 0% | |
| 1 Stars | 0% |
Overview
Install ArcGIS Pro on your personal computer for either academic or non-academic use.
Windows
| These instructions apply to Windows computers. | |
| Uninstall ArcGIS Pro: * Uninstall all previous ArcGIS Pro installations, then restart your computer. | |
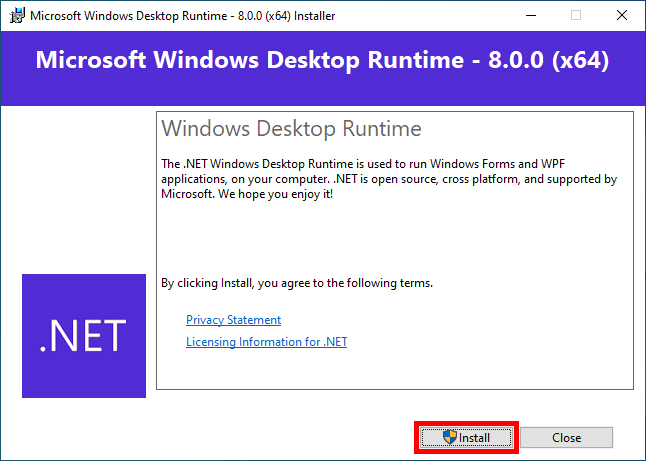 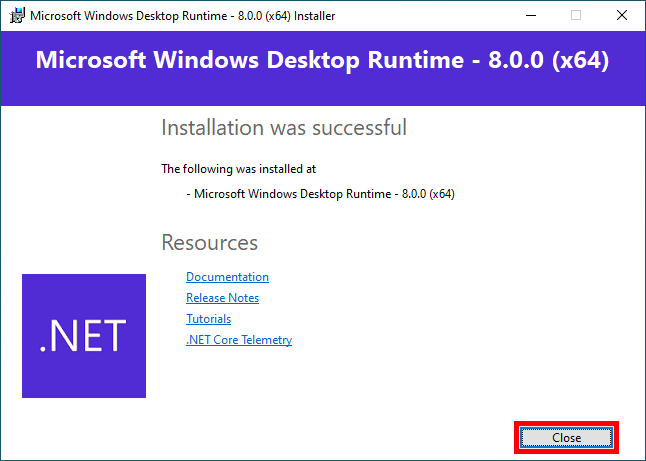 | Microsoft Windows Desktop Runtime: * Download Microsoft Windows Desktop Runtime 8.0 (x64). * Open the downloaded runtime installer and follow the installation prompts. |
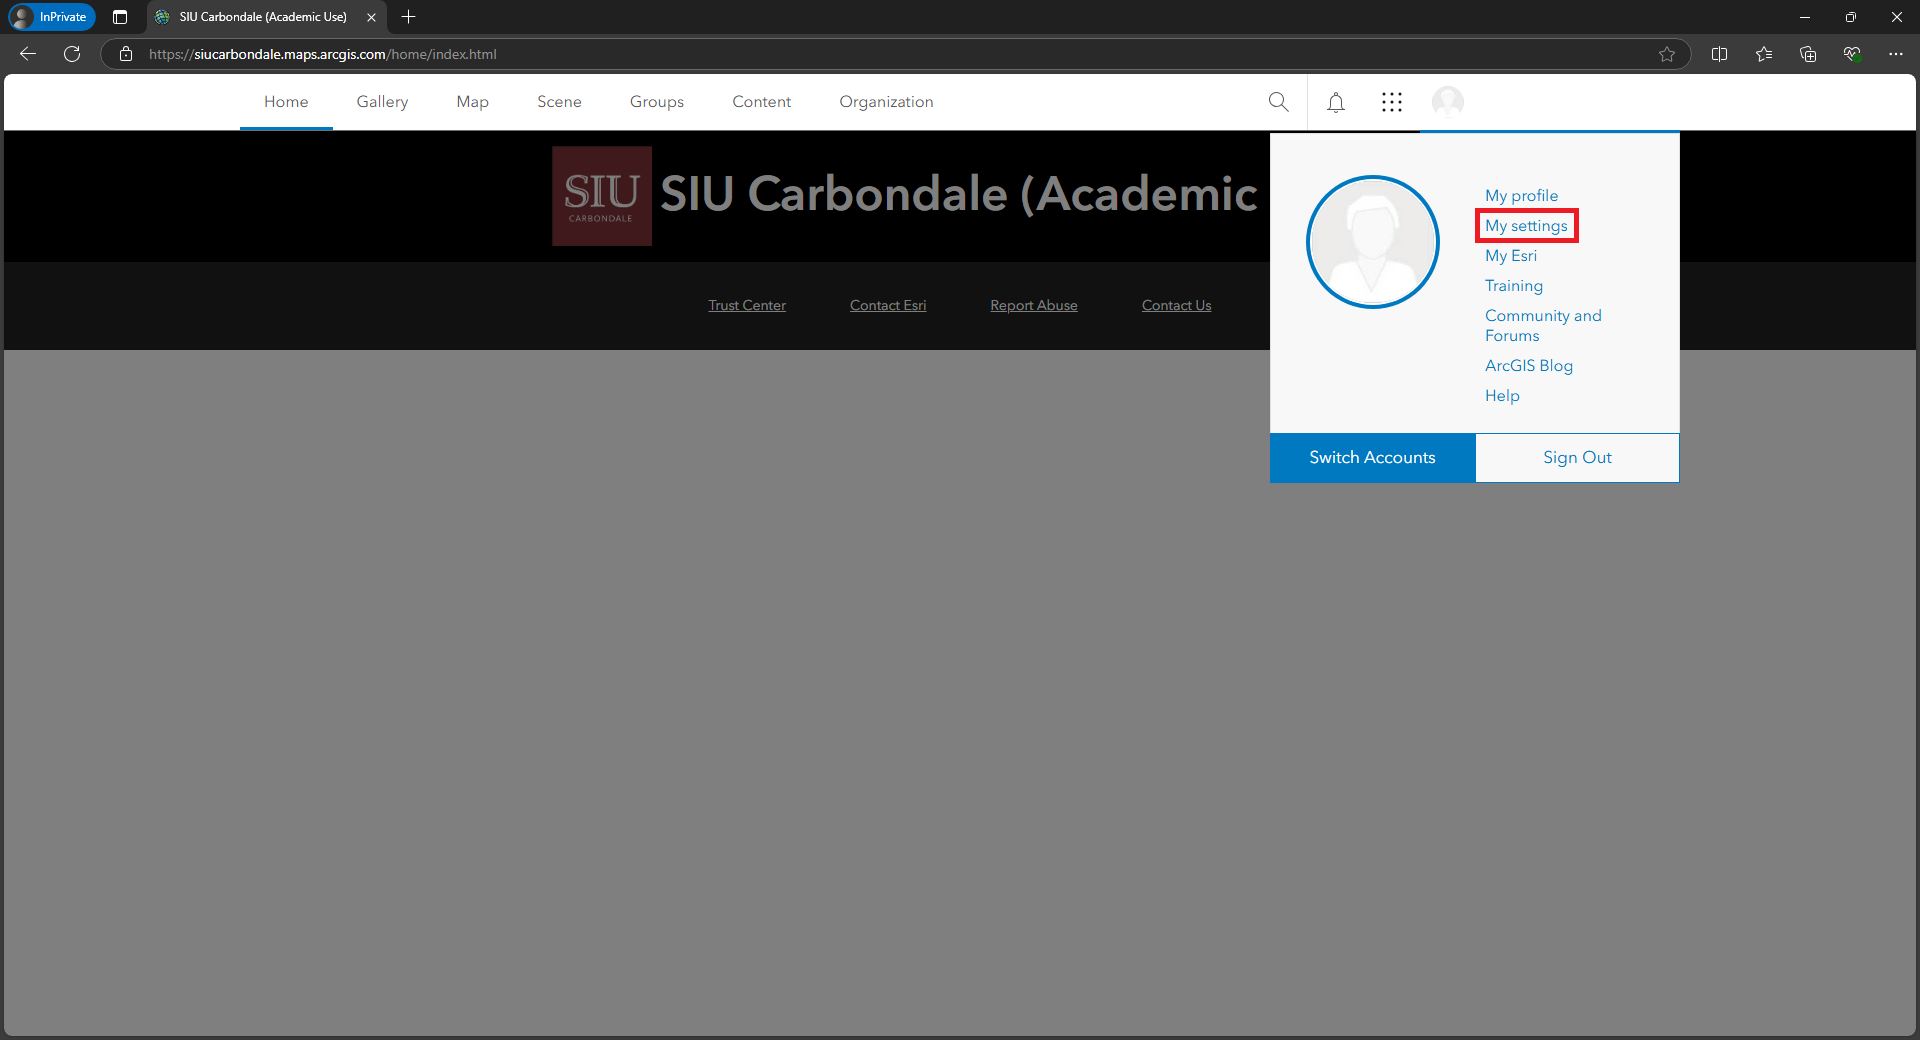 | ArcGIS Online: * Sign in ArcGIS Online * Click your username. * Click My settings. |
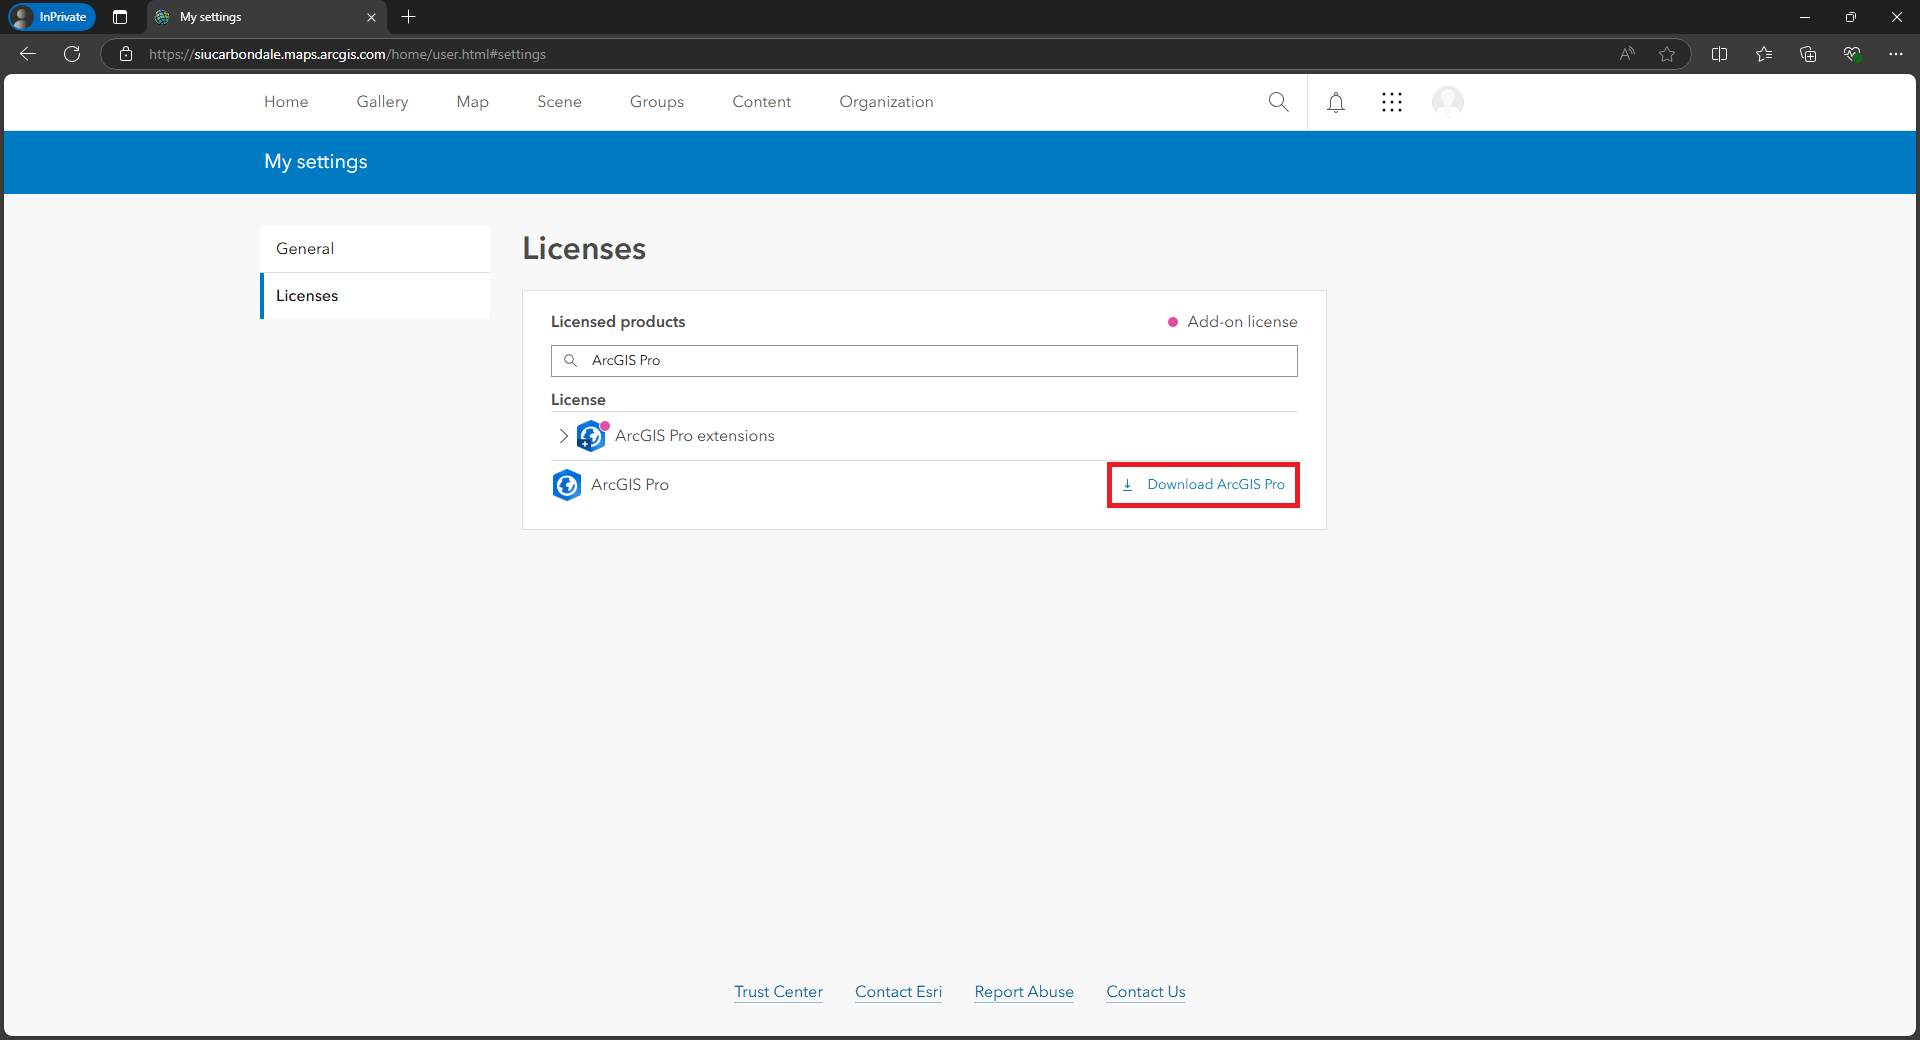 | Licenses: * Click the Licenses side tab. * Next to ArcGIS Pro, click Download ArcGIS Pro. |
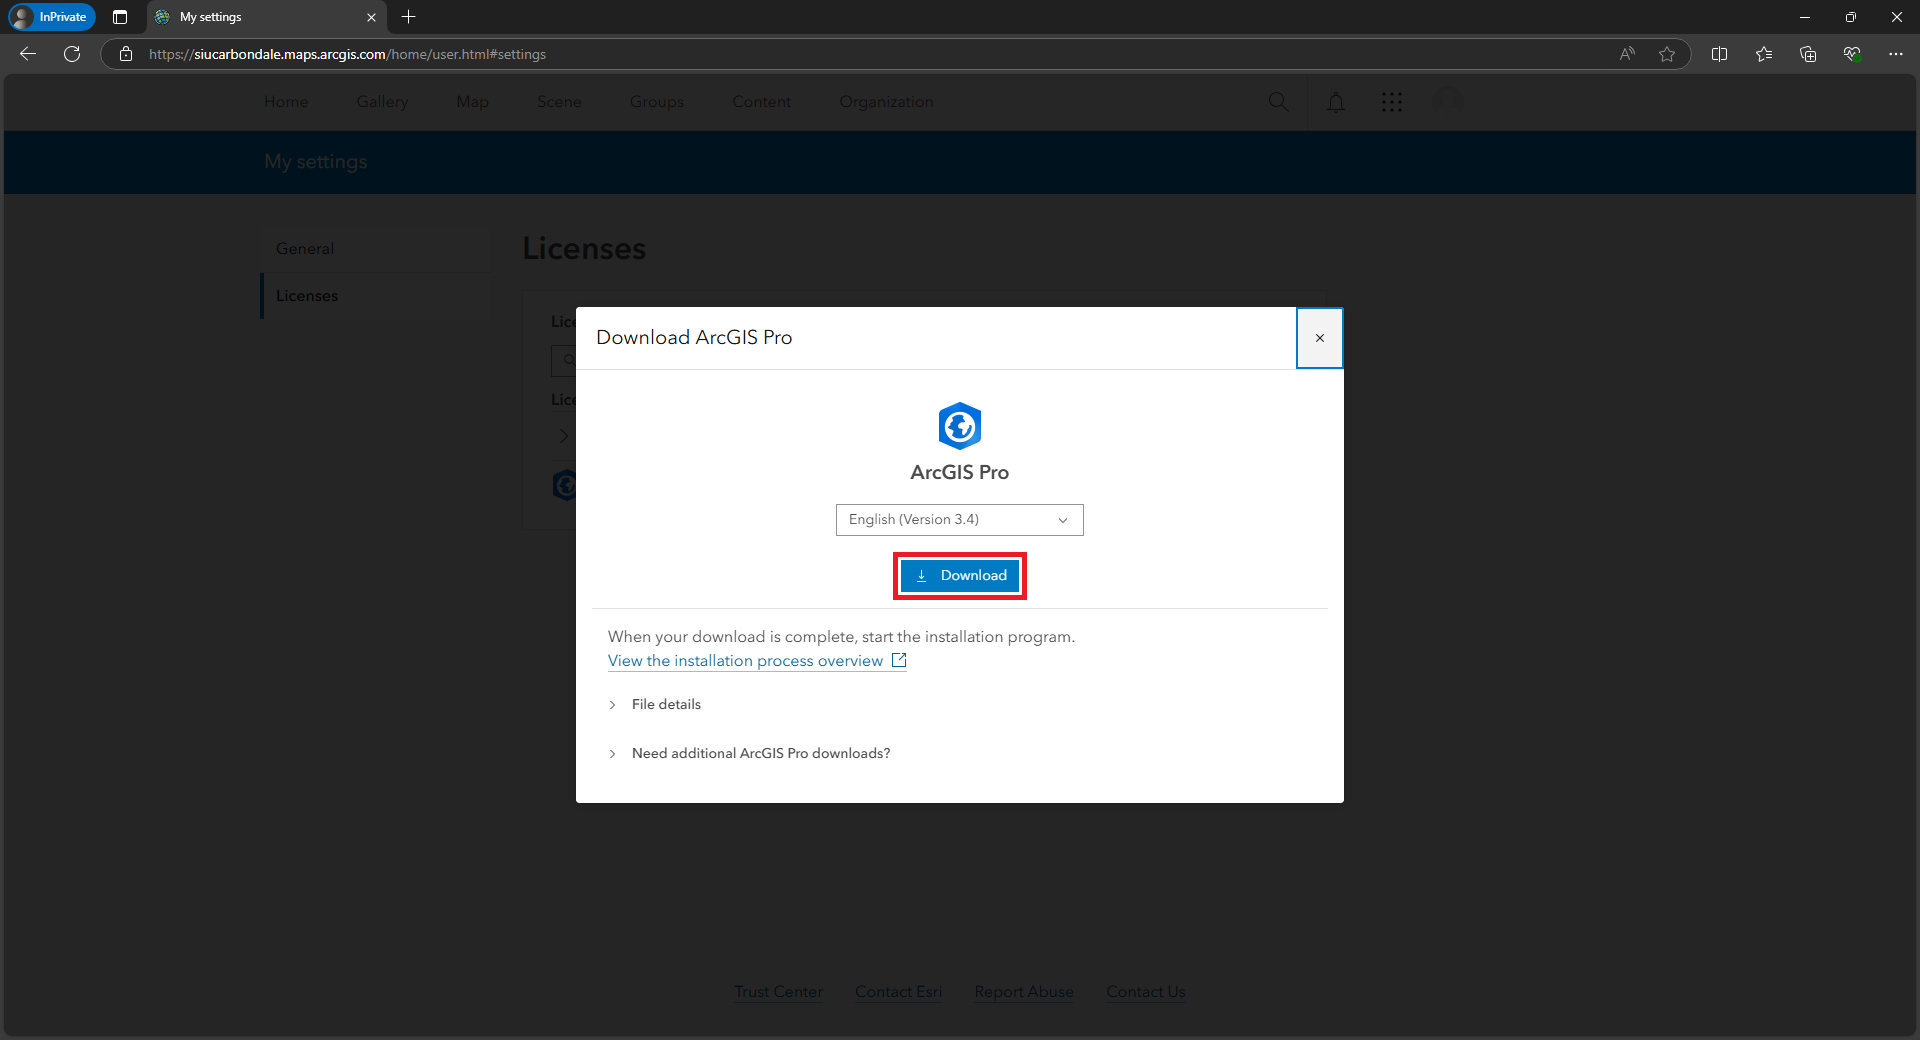 | Download ArcGIS Pro: * Click Download. * Open the downloaded installer and follow the installation prompts. |
 | Destination Folder for Files: * Click Next. |
 | Installation files have been successfully extracted to your computer: * Check Launch the setup program. * Click Close. |
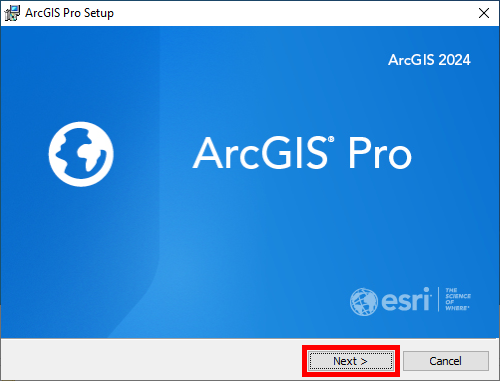 | ArcGIS Pro Setup splash screen: * Click Next. |
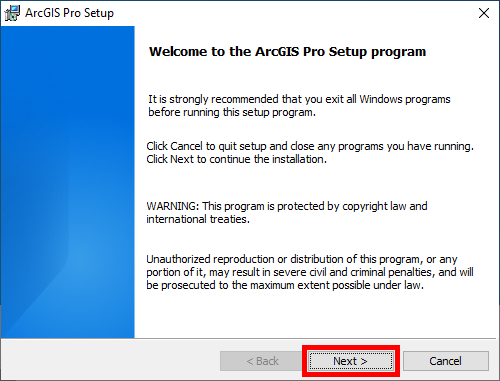 | Welcome to the ArcGIS Pro Setup program: * Click Next. |
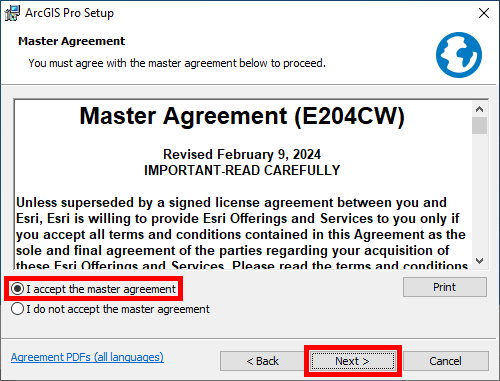 | Master Agreement: * Select I accept the master agreement. * Click Next. |
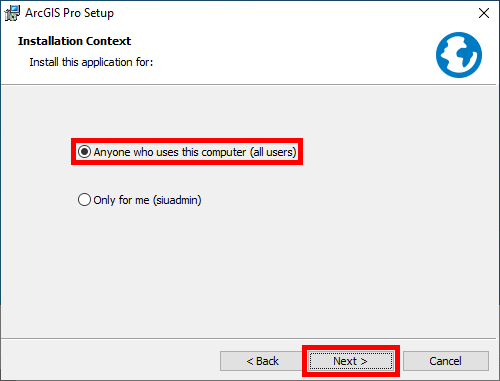 | Installation Context: * Select Anyone who uses this computer (all users). * Click Next. |
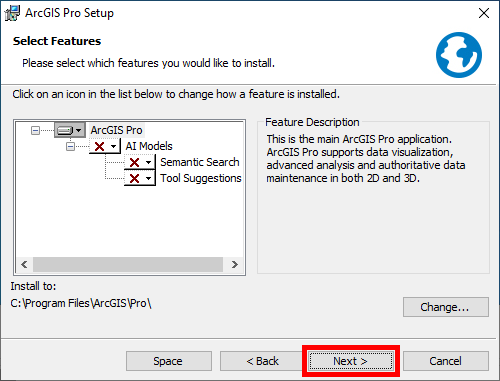 | Select Features: * Click Next. |
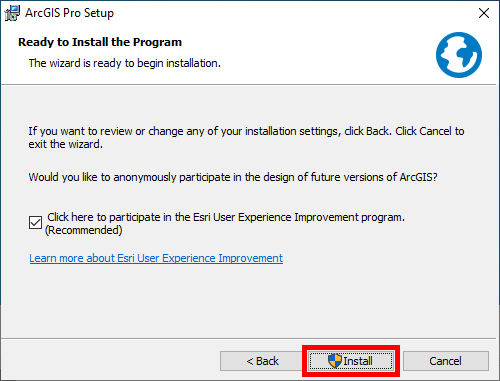 | Ready to Install the Program: * Click Install. |
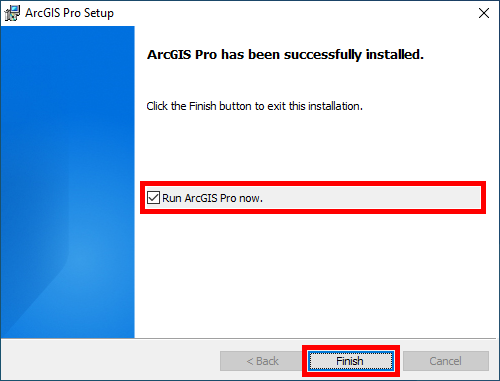 | ArcGIS Pro has been successfully installed: * Check Run ArcGIS Pro now. * Click Finish. |
| Upon successful installation, sign in to activate: * Sign In/Activate ArcGIS Pro |
Frequently Asked Questions (FAQ)
What is our ArcGIS license cycle?
Our ArcGIS license cycle is August 16th through August 15th the following year. Licenses must be renewed each year.
5 out Of 5 Stars
1 rating
| 5 Stars | 100% | |
| 4 Stars | 0% | |
| 3 Stars | 0% | |
| 2 Stars | 0% | |
| 1 Stars | 0% |